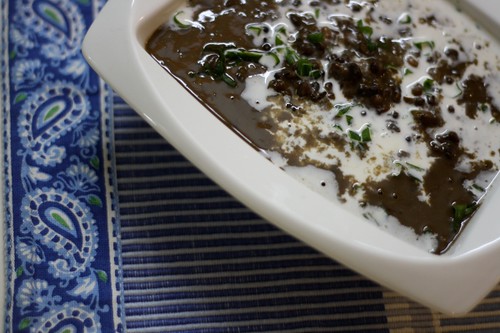
Urad sabat or Punjabi kali dal is a staple lentil in the Punjabi kitchen. It's taste and depth of flavor is unmatched. There are no fancy overpowering flavors here but just the wholesome toothiness of the lentil against the mildly spiced, rich, lusciously cooked down and thickened lentil itself.
Urad sabat is whole un-husked black gram dal(urad/udad/udid dal). It is nutritious, packed with energy and rich in proteins. When allowed to simmer over a long period of time, it tends to achieve a slightly slimy and thick consistency. Characterized by it's beautiful earthy flavor and a rich brown color, this dal is the queen of slow cooking! And you know just how good slow cooked food tastes...... every little lentil in this dish is given enough time and love to ripen and dissolve into perfection.
I remember seeing huge cauldrons of kali dal gently simmering away on a log fire at a dhaba in Delhi. Perfect, bellywarming food on a nippy December afternoon. Left outside to cook over a log fire for over 12 hours, the dal has an unmistakable aroma and fragrance which you just cannot reproduce with your gas or electric stove. All that soot,smoke and the fruity wooden logs flavor the food in a unique way. Visits to the village where my grand parents made their home reminds me of the food - it had the same fantastic taste and smelled so good. It was partly because of the freshness of the ingredients and also because ajji (My dad's mother) used to cook over a vole or a small log fire. And of course a whole lotta love that she put into it. :)
Don't be overwhelmed by the long cooking hours for this dish. As the efforts are well rewarded even by using your pressure cooker and reducing the cooking time by a great deal. The dal is fragrant and hearty and tastes oh so good with phulkas or rotis.
This recipe is from a book on Punjabi Cooking by Premjit Gill that I found in our attic. It was first printed in 1986! So I'm guessing nothing has changed about the way this beautiful lentil is cooked as most recipes that Google brought back were roughly the same. Although I did modify the recipe a wee bit after I was influenced by other recipes that I read and also some secrets that my neighbor shared with me.
Be forewarned that you only venture into making this dish when you have lots of time on hand. Not active cooking time, but you know the "let it simmer till it cooks down to a beautiful lush consistency" time. This dish took waaaaay longer than what the recipe promised. But it wasn't like I was slaving over it or anything. I just had to check on it occasionally to make sure that there was enough water to keep it from burning and sticking to the bottom. That reminds me - you have to use a thick bottomed vessel for this one.
I'm sending this recipe across to the very talented author, Sia of the gorgeous food blog - Monsoon Spice for the 15th helping of the MLLA (My Legume Love Affair) event. This event was started by Susan who has a fantastic blog space dedicated to her beautifully thought out recipes and pictures.
On to the recipe. Please look at the notes section for additional tips.
Recipe
Ingredients
For the dal :
1 cup urad sabat/ udad saboot/ whole un-husked black gram dal
1 tsp salt
1 inch piece of ginger, chopped fine
8 cloves of garlic, chopped fine or crushed
1 large onion chopped fine
10 cups of water
1/2 tsp of red chilli powder
1/2 tsp of turmeric powder
1/2 tbsp ghee
For the tarka
3 tbsps of butter/ghee
1 medium sized onion, chopped fine
1 medium tomato grated
1/2 tsp of garam masala
1/2 tsp cumin seeds
1/2 inch piece of ginger grated
3 green chillies chopped
4 tbsps of cream for a final flourish! (It's optional but it won't taste the same without it)
Method
Clean, wash and boil the dal in 10 cups of water. When boiling add the salt, ginger, garlic, onion, red chilli and turmeric powder and ghee. Cover and pressure cook for 1/2 hour. Then let the pressure drop. Uncover and allow to simmer on a low fire while you prepare the tarka.
Tarka
Heat the ghee/butter, add the ginger,chopped onion, garam masala, cumin seeeds and fry till light brown. Add green chillies to the simmering dal. Cook another 1/2 hour or until a thick consistency is reached. Serve hot with yogurt, plain rice, parathas or phulkas.
Notes : Here are my modifications to the recipe. The recipe didn't call for it but my neighbor was horrified that it didn't. "You have to soak it or it won't cook!" - the urad was soaked overnight for 10 hours. I then pressure cooked the dal for nearly an hour instead of the recommended half hour. And the simmering to reach the right consistency took another hour. A medium sized tomato was grated and added to the tarka to cut through the dal. This recipe makes a LOT of dal. Serves eight people, so you can easily halve the recipe if you need to.
Tuesday, September 29, 2009
Thursday, September 24, 2009
Dan Dan Noodles
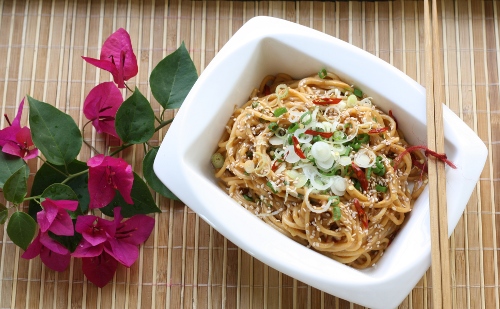
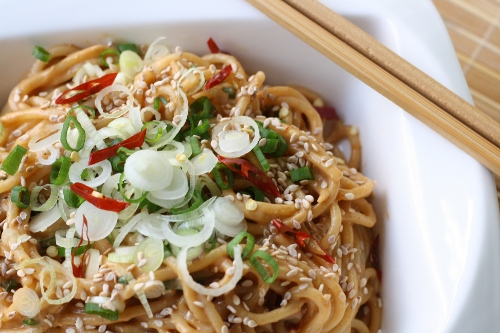
Remember that ad "Don't be a noodle.......be a smoodle....".What on earth am I talking about? Well I ran out of good introduction ideas for the noodle recipe that I'm posting about .......so this is my very lame introduction to a popular Chinese street food. This recipe had been bookmarked to try out for a lazy afternoon lunch a couple of weeks ago. So when a really bad craving for Chinese food hit me, but I didn't want to make something elaborate for just my toddler and me it was a perfect recipe to experiment with. Quick to put together, with a countable number of ingredients, bursting with flavors and hitting all your senses like good street food should, I present thee - Dan Dan Noodles.
This recipe is from Helen Chen's book titled "Chinese Home Cooking". I'm not sure why I picked this recipe out of 300 odd authentic Chinese home style recipes. But I'm glad I did. You'll love this recipe if you like the ideas of noodles doused with a peppery hot, salty and sweet peanut sauce.
In her book Helen has a small introduction or an interesting note about every recipe. Whether it was a family favourite, something that takes her back to her childhood dinner parties, stories from China or a historical note on the origin of the recipe. Gives the book a personal touch that I love. The following are her words on this recipe.
"Dan Dan Noodles are Szechuan street food at it's most traditional. Dan dan refers to the thumping sound made by the pails of noodles and sauce at the ends of bamboo panniers as they are carried through the streets in a sort of travelling fast food restaurant.The noodles are served cold or tepid.Once assembled,the dish holds well, although the noodles absorb the sauce after an hour. If you like saucier noodles, dress them just before serving. I sometimes add blanched and shredded snow peas or blanched bean sprouts along with the scallions for texture"
This recipe was modified to suit what I had on hand, please take a look at the note below for modifications. Also I honestly felt the noodles tasted better after I allowed them to soak in the peanut dressing for about 6 hours.(Evening snack for me yum yum) The next time I make this I would definitely make and dress the noodles in advance so they soak up all of that lovely piquant peanut sauce.
Recipe
Source : Helen Chen's "Chinese Home Cooking"
Ingredients
1 pound thin spaghetti
2 tbsps sesame oil
3/4 cup creamy peanut butter
3/4 cup Vegetable broth or water
2 tbsps light soy sauce
2 tsp chili oil, or to taste
1/4 tsp cayenne,or to taste
1 heaping tsp of Szechuan peppercorns, toasted and ground - Didn't have any so I substituted with a big pinch of white pepper and 1 tsp of red chilli flakes
3 scallions, white and green parts, thinly sliced
Method
Bring 4 to 5 quarts of water to a boil. Add the noodles and cook uncovered until a little more tender than al dente. Avoid overcooking or the noodles will be mushy. Stir occasionally to keep the noodles from sticking together. when done, drain and rinse with cold water until thoroughly cool.Drain well, transfer to a large serving bowl and gently toss with 1 tbsp of sesame oil(hands work best).Set aside.
While the noodles are cooking,blend together the peanut butter and broth in a bowl until smooth and creamy.Add the soy sauce, chilli oil, the remaining 1 tbsp of sesame oil,the cayenne and Szechuan peppercorns. Mix thoroughly.If you have time let the sauce sit for 30 mins or more to allow the spices to develop.
Pour the peanut paste over the cooked noodles and add the scallions.I use my hands to toss the noodles because they mix the ingredients more evenly and the noodles don't break.Serve cool.
Variation - For a vegetable garnish, add blanched snow peas and bean sprouts to the noodles with the scallions.
Note - I have slightly altered the recipe as I couldn't find some of the ingredients. Instead of the Szechuan peppercorns I added chilli flakes and white pepper. The recipe originally called for chicken broth but water worked just fine. Also to give it a bit of a kick and zing I added about 1 1/2 tbsps of hot sauce.You can use Sriracha if you have it on hand. Or good old Maggi Hot and Sweet sauce will work in a pinch. 1 tbsp of vinegar was added to cut through the creaminess of the peanut butter. The toasted sesame seed garnish was mainly to make the picture pretty but 'twas a good addition as they added crunch and nuttiness to the dish.
Wednesday, September 23, 2009
Bharli Vaangi
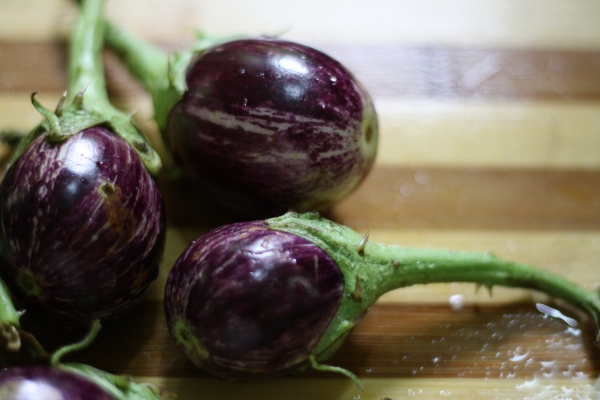
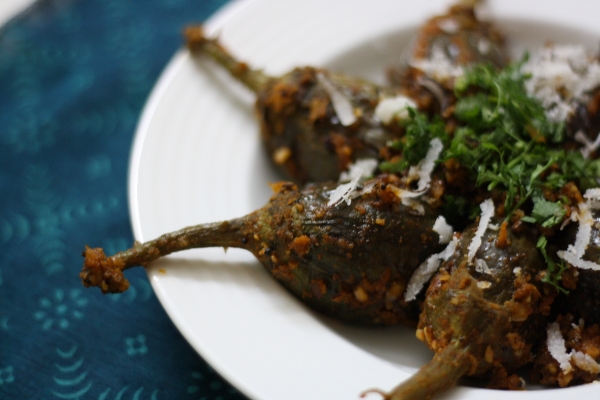
Are you tired of serving your vegetarian guests paneer, paneer and more paneer? Do I sound like those really loud and obnoxious TV commercials trying to sell you stuff that you never ever thought you would need? I guess I do. At least when I read this out loud to myself I do. Well here's a "new" recipe which is different from the usual garam masala and cream laced tomato gravy deals. Bharli vaangi is a traditional Maharashtrian dish and it translates to stuffed brinjals or eggplants.
Ever since I've moved to Pune I've been wanting to try out the local fare and learn how to cook authentic Maharashtrian food. This recipe caught my eye on TV. It was presented by the head chef of the Taj Hotel, Mumbai. I scrambled to find my recipe note book and didn't find a pen but I managed to scribble it all down with an old worn out orange crayon. Pens are always kept safely away from my toddler (and me too I guess) who is just discovering the joy of doodling on everything. When I say everything I really mean that. His belly button, the TV screen, my driver's license the TV remote, the back of his ears, the apple symbol on his dad's computer - you name it.
Back to the recipe - this simple recipe has few ingredients and a short and straightforward cooking method. The eggplants are tender and bursting with their own juices. They are slightly hot from the goda masala, tangy from the tamarind and sweet from the jaggery. What is Goda masala? It is an authentic Maharshtrian garam masala widely used in Maharashtrain cooking. If you can't find it you can substitute with regular garam masala. Here is a excellent post from Shilpa of Aayi's Recipes where you can learn to make your own goda masala.
I loved how different this dish tasted from everything that I've made or usually eaten at buffets or parties. It's definitely going to be the surprise dish on my menu when I have guests over.
Make sure that you use fresh brinjals for this dish. Older ones tend to be bitter. I've made this with the green Thai eggplants as well as the purple ones. I preferred the purple ones.
Here's the recipe, follow it to the T and you won't go wrong. That is exactly what I did and it was super delicious. You can serve this with roti or bhakri. Bhakri is a flat bread made with jowar flour. Look out for a future post on how to make bhakri.
I was requested by one my readers to indicate the level of difficulty on the recipes that are posted on this blog. Henceforth all recipes will be categorised as easy, moderately easy and tough cookie. Have fun!
Recipe
Difficulty level - easy
Cooking time - 25 mins
Ingredients
8 small brinjals
4 tsp of oil
1/2 tsp cumin seeds
a/2 tsp mustard seeds
2 tsp tamarind water
2 tsp jaggery syrup
1 cup water
salt to taste
For the masala stuffing
6 tsp of dessicated coconut/kopra
4 tsp of roasted and crushed peanut powder
1 tsp of red chilli powder
1 1/2 tsp of goda masala( you can use regular garam masala if you don't have any)
salt
Method
1)Make + shaped incisions on the brinjals deep enough to get the stuffing in but don't break them open.
2)Make the stuffing by mixing together all the ingredients listed under stuffing.
3)Stuff the brinjals with the stuffing and keep aside.
4)Heat oil in a pan and add the cumin and mustard seeds. When they begin to splutter gently slide in the brinjals and saute for 2 - 3 mins. Add a cup of water and lower the flame. Cover and cook for 10 -12 mins.
5)After the brinjals are fork tender add the tamarind water,jaggery syrup and salt to taste. Keep in mind that the stuffing has salt added in as well.Stir well and evenly distribute the seasoning. Remove from the flame.
6)Garnish with coconut shavings and fresh coriander. Serve hot.
Yay! you've cooked your first authentic Maharshtrian dish!
Thursday, September 17, 2009
Fried Chicken
Fried chicken is comfort food personified. Crispy and crunchy on the outside, soft and succulent on the inside. Most people can't resist the calling of fried chicken. There are numerous versions of it and I'm sure every cuisine and culture has its signature way of making it. One that immediately comes to mind is the fried chicken classic - Southern Fried Chicken - lightly breaded and fried to a golden crisp after being marinated in buttermilk that gives it a juicy and tangy taste.
My version of fried chicken is asli desi with a characteristic red color but not the kind achieved by artificial coloring. The marinade itself has very few ingredients and the most vital is the chilli powder which gives this chicken a hot and smoky flavor. This is the way my grandma or awwa as we would fondly address her used to make it ever since I can remember. It's one of those dishes that jazzes up a simple meal of just rice and dal, it's fantastic as an appetizer and can still hold it's own when served alongside biryani.
With this version of fried chicken the longer it marinates - the better it tastes. And since the marinade is ridiculously easy to put together you can just mix it up, refrigerate it and forget about it. And while you go about doing your stuff the marinade is working it's magic on the chicken. Yumm- O.
The chilli powder that this recipe calls for is plain ground dried red chillies. Note - this is different from chili powder that is used to season American chili. The lime in the marinade helps cut the grease and soften the chicken. Turmeric helps remove that chicke-ny odour. A teaspoon of oil added into the marinade helps keep the chicken moist. Don't be alarmed at the large quantity of chilli powder being used here. Trust me, after you're done frying the chicken the heat from the chilli has mellowed down quite a bit. So it's not insanely hot - which you would expect looking at the proportion of chilli being used. It has a pleasant bite to it. Nevertheless this is still a dish for people who love hot food.
Speaking of hot food and people who just cannot tolerate it reminds me of my dear friend M. (I know I know a lot of you lovely readers gave me feedback saying "What's with this whole dear friend thing?" But how else can I say this? I guess next time I'll look for a better phrase, until then.....dear friend it is.) She's a very sweet lady who helped me adjust so well to a new city and a new country. Most importantly she made me feel so much at home and took such good care of me when I needed it the most. They are one of the nicest couples we've met and befriended, very welcoming about the fact that we came from a different country - our food was different and our culture was different. So one fine day we decided to have them over for dinner. Both of them love Indian food and she also mentioned that she was especially fond of palak paneer. So what did yours truly do? But of course make palak paneer........ with about 10 extremely hot thai bird chillies ground into the spinach sauce. To me it was just an ordinary green chilli that we find at India. There was no way of fishing it out!
Well she was nice enough to swallow a few morsels of it before she had to run to the restroom. A few minutes later she emerged with tears streaming down her face! After a few bowls of vanilla ice cream and plain naan bread(which was all that she had for dinner - I know....... I'm awful) she was back to her old self willing to give pani puri a try the next weekend. Lesson learned - thai chillies are potent.
I'm sending this recipe across for the monthly Think Spice event which focuses on a spice a month and this month's theme is red chillies. Red chillies can be used in fresh, dried, whole or powdered form.
This event is being hosted by Lakshmi Venkatesh who blogs at this beautiful blog Think Spice - Think Red Chillies.
Think Spice was started by the very talented and gracious Sunita Bhuyan of Sunita's World.
I had previously forgotten to also link to Archana's Mad
Tea Party where she's hosting a Party Event in which the recipe entry should have less than six ingredients. What a great idea for cooks who are short on time and still want to entertain!
Here is red chilli in its most unadulterated and star-of-the-show form.
Recipe
Ingredients
1 kilo or 2lbs chicken cut into smallish pieces
3 - 4 heaped tbsps of red chilli powder
1 tsp of turmeric powder
1 large lime/lemon juiced
1 tbsp of neutral tasting oil
salt to taste
Oil for frying for chicken. Neutral in flavor - peanut or vegetable oil works best.
Method
1)Wash the chicken and pat dry. Keeping the surface of the chicken dry helps it absorb the marinade better.
2)For the marinade - mix together the chilli powder, turmeric powder,salt, lemon juice and oil. Make a thick paste.
3)Rub this marinade all over the chicken and let it rest in the fridge, overnight for the best flavor. If you don't have that kind of time, allow to rest for 2 hrs at least.
4)Deep fry the chicken in batches taking care not to overcrowd the pan. Maybe about 5 - 6 pieces at a time on a medium flame until they attain a uniform dark red color all over.
5)Serve hot with a generous squeeze of lime.
Monday, September 14, 2009
Penne with Basic, Awesome Tomato sauce
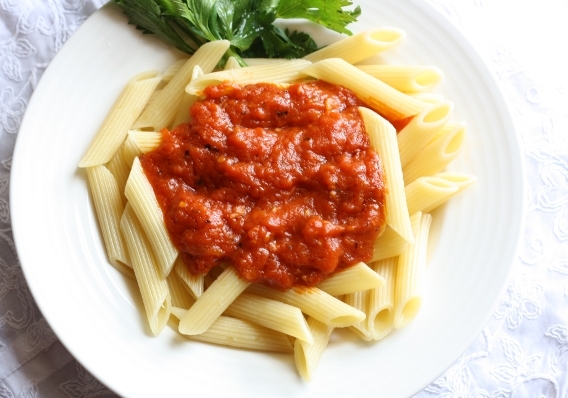
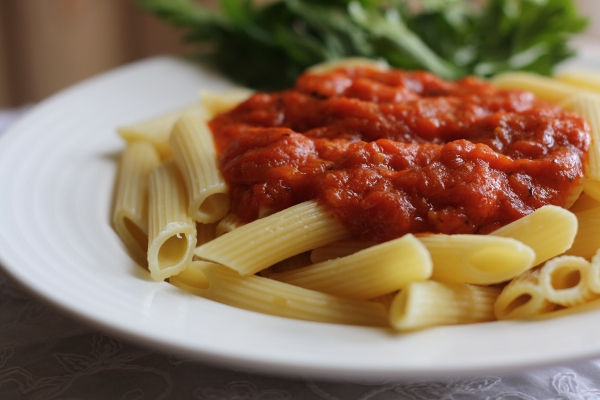
The crazy Domino's pizza ad has my toddler enamored with pasta. He will eat pasta for breakfast, lunch and dinner if I let him. So instead of ordering in I decided to make some of the Basic, Awesome Tomato sauce that Deb from Smitten Kitchen promised was .....well, basic and awesome. And it was AWESOME.
I always always always trust Deb when it comes to recipes that work. She has useful tips and hints and has tried and tested the recipe out completely with step by step pictures and instructions. Her recipes never disappoint....however lofty and expensive the ingredient list.
One bite - and the sauce took me right back to a fresh tagliatelle with tomato sauce dish that I had at a charming Italian restaurant in Soho. Considering that I practically thrived on not-so-stupendous pasta dishes while eating out at some places that were not vegan/vegetarian friendly it was quite impressive that it didn't taste like sauce that came out of a jar.
Italian food, even when it is vegetarian tastes simple,clean and delicious. It's primarily because the cuisine relies essentially on the freshness and natural flavors of the ingredients. You can taste the tang of the tomato,the fruitiness of the olive oil with just enough heat from the dried chilli pepper flakes and a hint of garlic. No one condiment stands out or overpowers the other. It is a beautiful marriage of all the flavors and they all live together in harmony and happiness. The only thing that was missing was a good shaving of Parmesan. But I didn't miss it all that much as the sauce more than made up for it.
I found that this sauce also freezes well and keeps fresh for up to a week in the fridge. Infinitely flexible too - you can thicken the sauce,tear and toss a few fresh basil leaves and voila! what have you here - a decadent pizza sauce. Also pairs well with cheesy garlic bread, as a dip for fried mozzarella sticks and forms a great base for a pink sauce when some fresh cream is swirled in.
For the pasta - this sauce works with both fresh and dry pasta. Cook according to package instructions and as a rule don't overcook the pasta. The pasta should be cooked al-dente. Typically takes about 10 - 12 mins of rapid boiling in plenty of salted water.
This recipe henceforth is going to be my go to for a Basic and very Awesome Tomato sauce. Instead of paying the pizza delivery guy a ton of money for something that won't come even close to tasting as good as this - let's get cooking!
Note : I modified the sauce a wee bit by adding some dried herbs - basil on one occasion and dried oregano on another. They both tasted equally good. I highly recommend the herbs for an additional Italian flavor boost.
Also as the tomatoes that I used weren't as red and plump and juicy as I would have liked them to be, I added about 3 tbsp of tomato puree that you can buy in a tetra pack at the grocery store. It gave the sauce a thick and rich red tomato-ey glow.
The white wine was omitted in my version of the sauce. I substituted with plain old regular water.
Recipe
Source : Smitten Kitchen
Moderately Easy Tomato Sauce
A more involved, seasonal update of the Basic, Awesome stuff.
Makes enough for one small/medium pizza.
4 roma tomatoes
1 to 2 tablespoons olive oil
2 cloves of garlic, minced
Pinch of red pepper flakes
Splash of white wine
1/2 teaspoon sugar
3/4 teaspoon salt
Bring medium pot of water to a boil. Poach the tomatoes for one minute only, and then drain them. As soon as they are cooled off enough that you can touch them, peel them. The peels should come right off. If they don’t, make a slit in the skins. This always does the trick.
Drain and dry the pot. Put it back on the burner over medium heat. Pour in olive oil and let it heat completely before adding the garlic and stirring it for a minute with a wooden spoon. Add the red pepper flakes and stir it for anther minute. You do not want the garlic to brown. Put the peeled tomatoes in the pot, along with the wine, sugar and salt. Break the tomatoes up with your spoon.
Let the sauce simmer for about 30 minutes, stirring occasionally, until the tomatoes break down. Carefully taste without burning your tongue and adjust seasonings, if necessary.
Wednesday, September 9, 2009
Pudinawale Aloo Paratha
A paratha is an unleavened Indian flat bread that is commonly eaten at breakfast,lunch or dinner. Parathas start with hand kneading a whole wheat dough, that is then portioned off into small balls that are eventually rolled out into circles. These breads are then cooked on a hot griddle or baked inside a tandoor.
Parathas are often stuffed with vegetables, lentils or meat to make a complete meal and thereby bypassing the whole hullabaloo of making an accompaniment to be served alongside plain old rotis. They are also an ingenious way to use up leftovers.
The Aloo paratha is a signature stuffed paratha bread. Albeit a hearty and filling bread but it hails from the land that is abundantly blessed with wheat and dairy - the Punjab. This region is often subject to harsh winters and agriculture is an important source of income for many families. So when you head out to work on a cold wintry morning you want to have a bellyful of good, hearty and wholesome energy giving food.
Parathas are not very common in the southern part of India where rice is more of a staple. But you do find some versions of it like the Ceylon paratha, the Malabar paratha and such. They are commonly served at restaurants that dot the highway. These parathas are layered and flaky and are served with a rich curry on the side.
Lalitha's Paratha Point close to Commercial Street at Bangalore is one place that assures you that they serve you authentic Punjabi parathas. The best parathas that I've ever had were at a small Dhaba on a highway from Delhi to Jaipur. They were thick and flaky, and the filling was robustly spiced but still not overpowering or greasy. Of course there were generous lashings of white butter accompanying it. But one paratha is all it took to keep us a group of well fed happy travelers.
Well to be honest with you I'm not a very authentic paratha maker. So don't go launch into an Aloo paratha competition with your old Punjabi neighbor aunty with this recipe. However I have stuck to the basic concept of spiced potatoes stuffed inside a bread. I've played around with the seasoning and spices depending on what I have on hand. This version is especially a breeze to make when your pantry and fresh vegetable source is dwindling down to look like old mother Hubbard's cupboard. It makes for a complete,satisfying and delicious meal when served with yogurt and mango pickle.
Surprisingly for my veggie hating toddler this goes down pretty well. Well....... does tomato ketchup count as a veggie? No? But.....it is bursting with lycopene and has all these antioxidant benefits. Still no?
Okay okay to get your little one to love this - just reserve some of the stuffing before tossing the green chillies in. Grate some carrots into this reserved portion. When you're making his paratha just griddle it as usual making sure to grease only one side of the paratha. You can up the protein content by adding some cheese. On the dry side grate some mozzarella or cheddar and fold over into a half moon. Press down and cook well on both sides till it crisps up and the cheese is all gooey and melty inside. Cut into three or more triangles and serve with the only veggie he thinks he's eating - the tomato ketchup . Hee hee. Evil.
Recipe
Ingredients
For the outer covering of bread
2 cups of whole wheat atta or flour
1 cup of water at room temperature
1/2 tsp of salt
1 tsp of oil
For the inner potato/aloo stuffing
4 medium potatoes
1 tsp of ginger finely grated or minced
2 tbsps of fresh mint leaves, finely chopped
1 tbsp of fresh green coriander leaves, finely chopped
8 hot green chillies, finely chopped
1/2 tsp of ajwain or carom seeds
1/2 tsp of amchur powder
1/2 tsp of garam masala powder
1/4 tsp of cumin/jeera powder
1/4 tsp of coriander/dhania powder
Method
To make the atta or dough
1)In a large mixing bowl measure out two cups of the atta or whole wheat flour. Add the salt and mix well using your hands to distribute the salt evenly across the flour.
2)Add the oil and mix gently using your fingertips to get a an uneven crumbly texture.
3)Add the water in gradually. Do not dump the whole cup of water in as you can't take it out but you can always add more in if your dough seems dry. See note below.
4)Knead well to form a smooth supple dough. This should take about 5 - 7 mins.
5)If you don't plan on using the dough right away you can add an extra 1 tbsp of water while kneading the dough and refrigerate the dough. It will keep fresh for up to 2 days.
6)Cover and set aside for about 20 mins before rolling the parathas out.
To make the potato/aloo stuffing
1)Pressure cook the potatoes in a double boiler mechanism i.e the potatoes are in a bowl that sits in a simmering water bath inside a pressure cooker. Don't add the potatoes directly into the water. Another option would be to microwave them till they are soft. Boiling the potatoes is a no-no as they soak up a lot of the water and the stuffing tends to get slimy.
2)When the potatoes cool enough to touch, remove their skins and grate them.
3)Heat a thick pan and add the oil when the oil is hot but not smoking add the carom/ajwain seeds roast for about 5 secs before adding the finely chopped chillies and grated ginger.
Add the cumin and coriander powders and quickly stir them about without burning the mixture.
3)Toss in the grated potatoes along with the salt and mix well so that the mixture gets a uniform distribution of the salt and spices.Take away from fire.
4)Add the amchur and garam masala powders and mix well.These are added at the very end as they lose their flavours when subject to high heat.Lastly add the fresh mint and coriander leaves.
5)Refrigerate for at least half an hour to make the stuffing easy to work with. I recommend this step highly - especially if you're trying your hand out at this for the very first time.
To make the actual paratha itself
1)Divide the dough into golf ball sized portions.
2)Roll them into medium sized circles maybe about 6 inches in diameter or the size of a CD.
3)Take about 2 heaped tablespoons of the stuffing and shape it into a ball.
4)Place the stuffing at the center and gently gather the edges and twist to form a money bag shape. Remove any excess dough that sticks out.
5)Roll gently to form a ball. Roll out these stuffed dough portions with a rolling pin gently making them as thin and circular as possible without forcing the stuffing out. They can be up to 1/4 inch thick.
6)Grease a thick griddle or a tawa and heat on a medium flame. Gently lower the rolled out paratha onto this. Grease on both sides and cook well till you see uniform brown dots all over the bread.
7)Keep warm until it time to serve.
Additional notes to help your parathas turn out great!
1)Rest and refrigerate the dough and stuffing for at least 2 hours. This makes them easier to handle and roll out.
2)When making the atta or bread dough don't follow recipes to the T. Different flours absorb different quantities of water. It all depends on how fine the wheat is ground. Watch for signs where you think the dough has had enough or too little water. Eye ball it.
3)The flour used impacts the texture and flavor of the bread. I gues that was obvious and unnecessary to say but I can't resist. What I'm trying to say here is use good quality atta. We use Aashirwad atta at home. It's pretty good. Your store help should be able to guide you on this. The next best thing is to actually grind your own flour at a mill nearby......but that's a completely different story saved away for another post.
Sunday, September 6, 2009
Pani puri - need I say more?
A common sight in Pune city is telawallas standing at street corners selling Pani puri. Even if you can't see the pani puri maker you can definitely spot his stall from a mile away because of the huge gaggle of girls engulfing him.
"What is it with Pani puri and girls????" asks my husband quizzically. He just can't figure out why an empty pastry shell stuffed with spicy mashed potatoes,chickpeas and filled with the sweet and spicy hot pani drives almost all girls mad. If you've ever been to a crowded pani puri tela on a busy weekend - you would know. It's mental. But also very fundamental. Hee hee. Couldn't help myself.
And I'm ALL girl. One hundred percent of it. At least my undying love for pani puri vouches for it. Girls love pani puri.
I think I know why - it's because when a pani puri explodes in your mouth you taste it all - spicy,sweet,crunchy,syrupy,smoking hot with little pieces of the puri shell all finally going down giving you just enough time to gear yourself up for the next onslaught. Akin to the toffee shock that Silky and Moon-face hand out to Jo,Bessie and Fannie atop the Faraway tree.:)
The fun and anticipation accompanying the wait in line for another morsel of this quintessential street food of India makes it irreplaceable as one of the most craved-for foods by Indian women!
My love for pani puri began when I was a little baby. Amma never gets tired of telling me the story about how she walked 9 kms the day before I was born to get to a Pani puri vendor. On reaching the place she proceeded to order and eat every single thing on the menu at the chaat stall. Now, research says that a pregnant mother's habits can influence her baby. Listening to Mozart,reading books or learning algebra may ensure that your kid is a whiz. On the same lines of thought - could I have inherited this chaat fervor from mommy dearest? That is what I think!
Amma used to take three public transport buses to get to a cookery school where she learned the art of making chaat. Well all that chaat has turned me into an avid and sincere lover of all things chaat-like. But Pani puri remains my essential favorite.
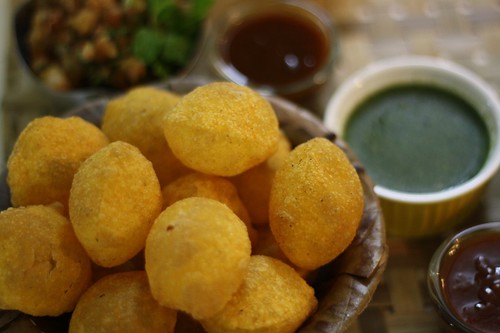
Pani puri goes by various names in India.You call it Pani puri in the South and the West. Way up North it's called golgappa and in the East they call them puchkas. But what a pani puri essentially is - a crisp fried puffed pastry case that is stuffed with a potato and legume mixture and then filled to the brim with a spicy and sweet watery concoction. The heat factor comes from the bright green theeka or khara pani made with fresh green mint,herby coriander,pungent ginger and hot green chillies.The sweet and tangy counterpart is the meetha chutney made with jaggery and tamarind.There is a a good deal of ground spices like black salt,amchur(dried mango powder),chilli powder and fresh lime juice that add to the zing of this dish.
The pani puri recipe that I'm going to share with you comes from my mother's old and well preserved recipe handouts from those classes that she attended almost 26 years ago! They are all yellow and folded over twenty times at least. Little notes adorn these much loved and used pages. And I'm very lucky to have them with me today.
Hope you love making them and sharing them with your loved ones as much as I do!
Recipe
Ingredients
The puris are easily available at an Indian grocery store.Make sure the pack is fresh as soft and stale puris are no fun. A pack contains about 50 puris.
Allow at least six puris per person.
For the hot/teekha/khara pani
1 cup packed fresh coriander leaves
1/2 cup fresh mint leaves
1/2 inch piece of fresh ginger
6 - 8 hot green chillies
1 tsp of freshly roasted and ground cumin powder
1/2 tsp of black salt
1/2 tsp of amchur powder
1 lime juiced
salt to taste
For the sweet/meetha date and tamarind chutney
1 cup of tamarind soaked in a cup of warm water for at least 2 hours.Or nuke in microwave just to soften
1/3 cup of seedless dates soaked in warm water to soften or microwave them
1/2 cup of jaggery
1 tsp of freshly roasted and ground cumin powder
a big pinch of chilli powder
a big pinch of salt
For the potato stuffing
3 medium sized potatoes
1/2 cup black chickpeas soaked in water overnight.You could also use garbanzo beans/kabuli channa or moong beans.
1 tsp red chilli powder
1/2 tsp of coriander powder
1/2 tsp of freshly roasted and ground cumin powder
1/2 tsp of black salt
1/2 tsp of amchur(dried mango powder) or 1/2 lime juiced
2 tsps of finely chopped coriander leaves
Method
For the hot/teekha/khara pani
Grind together the coriander,mint,ginger,green chillies,cumin,black salt and amchur powder.Add lemon juice and salt.Taste for the right level of hotness and sourness. Dilute with water to make the teekha pani.
For the sweet/meetha chutney
1)Grind the SEEDLESS dates in your blender to a fine paste.Please please please double check to see if it is indeed seedless or you'll end up smoking your blender.
2)With your hands extract the tamarind pulp.Strain and keep aside.
3)In a thick bottomed pan heat the tamarind pulp and bring to a gentle boil.Now add in the date paste.Cook for 5 mins.
4)The color of the chutney will go from a light brown to darker brown.Break up the jaggery into pieces add it in and mix well taking care to make sure that they dissolve.
5)Add the salt,chilli and cumin powder.Cook till the chutney thickens. This should take 10 - 15 mins.
For the stuffing
1)Boil,peel and cool the potatoes.
2)Boil the black chickpeas.Cool and drain.
3)Mash the potatoes gently and break them up.Add in all the listed powders.Add the chickpeas.
4)The resulting mixture should be lumpy and uneven.Take care not to over mix or you'll end up with a mush.
5)Garnish with the finely chopped coriander leaves.
To assemble the pani puris
The traditional street hawker way - don your grimy old pani puri vendor turban. Hand out tiny plates to your eager audience. Deftly make a hole in the middle of the puri so it can be stuffed with potato. Then add a few drops of the sweet tamarind and date chutney. Dunk in the hot green pani ensuring that it is brimming with the flavours of India.Now you literally have your guests eating outta your hands!
The do-it-yourself way - This is a fun idea when you have friends at home for a chaat or pani puri party. Simply fill a couple of woven baskets with the puris. Leave out individual cups for the other accompaniments. Let your guests have fun assembling and eating the pani puris.
Subscribe to:
Posts (Atom)