Friday, December 18, 2009

Praline Cookies

Finally a post on cookies on Cookie Shutter! Well worth the wait. Now that I have an oven, I'm on a frenzied baking spree! These praline cookies are thick and chewy, choc-a-bloc with crunchy bursts of praline and melty gooey chocolate chips. The absolute best way to enjoy these cookies - eat one while it's still warm, straight from the oven with a glass of cold milk. (and you're sitting on the kitchen counter waiting for the rest of the cookies to cool down). You're now in cookie heaven.

CookieStack

This recipe is from a book titled Spectacular Desserts from Better Homes and Gardens. It's a fairly old book that I picked up at a library sale. There are basic recipes on how to make good bittersweet chocolate sauce, home made creme fraiche and extravagant ones like the 5 layered mango butter cream cake that uses a whole pound of butter, just for the frosting! Sometimes, you find the best and winner recipes in old forgotten books......

Praline

These cookies are delicious - especially if you're looking for a splendid twist in your favourite chocolate chip recipe. Just make the praline and use in your recipe along with the chocolate chips.

CookieDough

If you don't have pecans you can use walnuts, almonds or cashew nuts instead. Makes almost three dozen regular sized cookies. Lots to share and perfect for the festive season!

CookiesCooling

Recipe

Difficulty level - easy
Cooking time - 30 mins
Makes 3 dozen regular sized cookies or 18 large cookies

Ingredients

1/3 cup sugar
2 tablespoons water
1 cup chopped toasted hazelnuts or pecans(you can use almond/cashews/walnuts)
1 cup or 2 sticks butter, softened
2 1/2 cups all purpose flour
1 cup packed brown sugar
1/2 cup sugar
2 eggs, at room temperature
1 teaspoon vanilla extract
1/2 teaspoon baking soda
2 ounces semi sweet or bitter sweet chocolate chips

Method

Grease a large baking sheet with butter. Set baking sheet aside.

For praline, in a heavy medium saucepan stir together 1/3 cup sugar and water. Cook and stir over medium-high heat till boiling.Then Cook for 2 1/2 to 3 1/2 minutes more until syrup is a deep golden brown. Remove from heat. Stir in 1 cup nuts. Immediately pour onto the prepared baking sheet. cool completely on a wire rack until firm.

When firm, transfer the praline into a heavy duty plastic bag. Using a rolling pin, crush the praline into small pieces. Set aside.

For cookies, in a large mixing bowl beat the 1 cup butter with an electric mixer on medium to high speed about 30 seconds or until softened.
Ad about half the flour, all of the brown sugar, 1/2 cup sugar,eggs, vanilla and baking soda. Beat till thoroughly combined, scraping the sides of the bowl occasionally. Then beat or stir in the remaining flour. Stir in crushed praline and chocolate chips.

Scoop the dough using a cookie scoop one at a time, 4 inches apart onto a cookie sheet. Flatten slightly. Bake in 350 F for 13 - 15 minutes or till edges are lightly browned. cool cookies on the cookie sheets for 1 minute. Then remove cookies and cool on wire rack.

Note - The praline can get a little tricky - it actually went from sugar to syrup and back to sugar on me. Just keep at it - stir away and it'll suddenly caramelize into a golden hue. At this stage work quickly as the caramel tends to burn. There's another way to make caramel and it requires no water; here's a fantastic post by David Lebovitz on how you can do this easily.
Don't fret if you don't have an electric mixer - use a hand whisk/spoon to cream the butter. Takes a little longer but totally do-able.

Saturday, December 12, 2009

Mark Peel's Pesto (Pasta)

Pesto is a flavorful Italian condiment that is often used as a topping for crisp bruschetta, on a delicious no-tomato-sauce pizza, as a sauce for summery pasta, it even tastes fantastic when just spooned over golden oven roasted chicken. There are infinite possibilities with how you can combine and use this versatile pesto to liven up a dish.

PestoPastaOlive

Pesto is usually made with fresh basil leaves, pine nuts, garlic and olive oil - all crushed to make a deliciously fragrant sauce. Fresh pesto is vibrant and brilliant green in color and is best when used immediately. But I know a lot of people make pesto and stash it away in the refrigerator for a rainy day. This pesto keeps for at least 2 weeks when refrigerated. As the basil gets oxidised quickly, make sure to pour a thin film of olive oil to keep the discoloration minimal. The appearance suffers but the taste is just as good. Once you make a batch of this use it liberally on sliced toasted baguettes, inside a wrap or make a delicious roasted vegetable sandwich.

PestoPasta

This recipe is adapted from Martha Stewart's Living Cookbook . A compilation of over 1200 recipes from the first decade of the magazine. It's a great book to have on your shelf, especially because it's so extensive and still has one of the best indexes that I've seen in a cookbook. So it's very easy to find a recipe with an ingredient that you have on hand and want to use up (very good for an ingredient hoarder like me, as I often buy a whole bunch of shiny new things to cook with and run out of ideas before the actual ingredient runs out). I've bookmarked quite a few recipes and cannot wait to try them out in my new oven!

PestoPastaFork

Recipe

Difficulty level - Easy
Cooking Time - 5 mins
Makes - 1/2 cup - enough to use as a sauce for a pound of pasta - serves four.

Mark Peel, chef/owner of Campanile in Los Angeles, makes this coarse-textured pesto using a mortar and pestle rather than a food processor. Basil leaves turn black if exposed to the air after they are cut, so pour extra virgin olive oil over the surface of the sauce to preserve its brilliant color.

Ingredients

3 garlic cloves
3 tbsps pine nuts, toasted ( I used walnuts instead)
1/2 tsp kosher salt, plus more for seasoning ( I used sea salt instead)
1/4 cup plus 1 tbsp extra-virgin olive oil
1 cup coarsely chopped fresh basil leaves
1/4 tsp of fresh cracked black pepper ( my addition )
Fresh lemon juice

Method

Using a mortar and pestle, crush the garlic and the nuts with 1/2 tsp of salt and 1tbsp of oil until pulverized. Add basil; work until you have a rough paste. Whisk in remaining oil in a stream. Season with salt and lemon juice.

To make pesto pasta - Cook pasta in rapidly boiling salted water until al-dente, usually takes around 10 -12 mins for dried pasta. Drain the pasta and reserve some of the cooking water. Coat the pasta liberally with the pesto. You can also add fresh grape tomatoes, olives, roasted eggplants and any other veggies that you like. If the pasta gets too dry, use the reserved cooking water to thin the sauce out.

Note - if you don't want to go the mortar, pestle and exercise route, blend all these ingredients in a blender to a coarse paste. It's totally optional but I add about 1/4 cup of grated Parmesan into the pesto just before using it. Feel free to leave this out if you don't intend to use it. If you do not plan on using the pesto immediately and want to refrigerate it - do not add the cheese until just before serving/using.

Monday, November 30, 2009

Alasanadala kanda gadda kara pulusu

Kara pulusu is a relatively hot,fragrant and tangy curry that we often make at home. This version pairs black eyed peas and yam in a fierce curry sauce. Forget the milder and ever present sambar with your rice. If you're looking for something that'll wake up your taste buds and give your gastric juices a kick, then this is what you need.

KaraPulusu

There are many versions of this curry, you could even make it with just okra or baby brinjals. Pulusu means tamarind or sourness in telugu. The tomatoes as well as the tamarind deliver an extra punch and bring out all the wonderful aromas of the spices. Make sure that you use ripe tomatoes to get the perfect red color in your pulusu. If you're unable to find yam, proceed with just the black eyed peas.( increase the quantity to two cups of the peas)

This is something that I've learned to make from my mother-in-law, she happens to be a fantastic cook and a patient teacher as well. I remember, I cooked up a big batch of vankaya (brinjal) kara pulusa and annam (rice) and ate just that for three days in a row. After nearly two weeks of bland subways in cold and winter struck NYC, I just couldn't wait to get back to my spice filled kitchen. I know that NYC is probably the most cosmopolitan city when it comes to dining out. And I love love love NYC. But eating out with a baby, especially when it's freezing and snowing on Wall Street is just not fun.

karaPulusu4

It happens to all of us, a long absence from familiar and comforting foods that leads to a severe craving for basic and simple food that we often don't give much importance to. After a long vacation - what do you want to get back to? What do you miss the most and what do you crave to eat as soon as you hit home?

I'm sending this recipe across to this month's MLLA host - the very witty and hilarious-to-read Sra, who has a blog filled with beautiful pictures and wonderful recipes and great stories MLLA (My Legume Love Affair) event. This event was started by Susan who has a fantastic blog space dedicated to her beautifully thought out recipes and pictures.

KaraPulusu2


Recipe

Difficulty level - easy
Cooking time - 30 mins
Serves - four

Ingredients

1 cup - Black eyed peas
1 cup - Yam/Suran/kanda gadda, chopped into tiny 1/4 inch cube pieces
2 tbsps onion, finely chopped
1/2 tsp mustard seeds
1/2 tsp cumin seeds
10 - 12, curry leaves
Tamarind pulp, to taste
A big pinch of hing
Salt


For the pulusu masala -

1 1/2 - medium sized onions,sliced
2 - medium sized ripe red tomatoes, chopped
8 - cloves of garlic
3 tbsps of fresh grated coconut - optional but recommended
1 1/2 tsp coriander powder
1 1/2 tsp red chilli powder
1/2 tsp turmeric powder
1/2 tsp of methi/fenugreek powder
1/2 tsp of cumin powder
a big pinch of hing/asafoetida

Method

1)Clean and wash the black eyed peas and boil/ pressure cook until soft but not mushy. This should take about 10 mins in a pressure cooker. If you don't have a pressure cooker boil the peas and watch and check for done-ness by pressing them between your finger tips. They are done when they are soft enough to squish.
2)Cook the diced yam pieces separately until soft. Do not try cooking the peas and yam together as they have varying cooking times.
3)Prepare the masala paste. Heat a tsp of oil in pan, add the onions and garlic and roast until slightly browned. Allow to cool. Transfer to a blender. Add the chopped tomatoes and coconut (if using); add the coriander, chilli, cumin, turmeric, methi and hing powders and grind to a fine paste. Keep aside.
4)To put everything together. Heat 1 tbsp of oil in a pan, add the mustard and cumin seeds. When they begin to splutter add the curry leaves, hing and chopped onions. Fry until golden brown. Next add the prepared masala paste and swiftly saute the paste for about 2 minutes. When the raw smell disappears. Add the black eyed peas and the yam.( along with the cooking water). Add salt and tamarind pulp to taste. Bring to a boil. Then cover and cook for 10 - 15 mins to allow the flavors to meld together and you obtain a slightly thick and stew like consistency.
5)Serve hot with rice and papadums on the side.

Tuesday, November 24, 2009

Banana Walnut Muffins - OMG good!

A soft, moist and tender crumb for snacking or toasting, with real banana flavor and crunchy toasted walnuts. This is what the recipe promises and that's exactly how the muffins turn out. Every single time.

BananaWalnutMuffins

The recipe originally makes a killer banana bread but after making muffins out of the exact same recipe umpteen number of times - it's safe to say they are equally crazy delicious in the muffin form as well. Cuter and more portable too. And thankfully not disastrous on your waistline.

This recipe is from the book titled "Here in America's Test Kitchen" by the editors of Cook's Illustrated. That should say it all. These folks leave no stone unturned in their quest to find recipes that work. They cover everything - how to pick and choose the best ingredients, equipment comparisons, techniques, do's and don'ts, neat tips and tricks. Plus a really cool science corner where everything makes so much sense! All of the recipes from ATK are usually done a thousand times or so over until they are perfected. So you don't need to do the any of the experimenting or frustrated screaming. Of course, I agree that sometimes they do go over board with you have to buy exactly this loaf pan, stir the batter exactly twenty one times and use fruit that ripens during a lunar eclipse or else you'll fail miserably. But perfection has a price and if you want create something that tastes achingly good, follow their instructions to the T and you won't be disappointed.

MuffinsInATray

The hubby rated these muffins a 10/10 - maybe being ravenous after a long day's work influenced the score - a bit. These muffins are a standard at my kitchen. A breeze to put together and a perfect way to use up over the hill bananas. I've even made a healthier version by using whole wheat flour instead of all purpose flour and also sneaked in a tsp ground flax seeds. Tastes great too and is a perfectly wholesome breakfast/snack for toddlers.

BananaWalnutMuffins2

P.S - CBD look I'm baking with all the wonderful goodies that you'll so thoughtfully put together for me. Love you guys! I cannot thank you enough :)

Recipe

Difficulty level - ridiculously easy
Time - 20 mins
Makes about 18 regular sized muffins

Ingredients

2 cups unbleached all-purpose flour
6 tbsps butter, melted and cooled
3/4 cup sugar
3/4 tsp baking soda
1/2 tsp salt
3 very ripe, soft, darkly speckled large bananas mashed well by hand
1/4 cup yogurt
2 large eggs, beaten lightly
1 tsp vanilla extract
1 and 1/4 cup walnuts, toasted and chopped coarse

Method

1)Preheat the oven to 350 F. Arrange the paper cups in the muffin tray.
2)Whisk flour, sugar, baking soda, and salt together in a large bowl; set aside.
I find the sugar in India is not as fine as that in the US. So I usually whizz the sugar in a blender for 10 secs or until it resembled caster sugar in fineness. This step is important or the sugar will not melt easily.
3)Mix the mashed bananas, yogurt, eggs, butter and vanilla with a wooden spoon in a medium bowl. Lightly fold banana mixture into the flour mixture with a rubber spatula until just combined and the batter looks thick and chunky. Fold in walnuts.
Scoop the batter into the muffin tray.
4) Bake until the muffin tops are golden brown and tester inserted in the center of a muffin comes out clean. Cool in pan for 5 mins, then transfer to a cooling rack. Serve warm or at room temperature.

Tuesday, November 10, 2009

Goan Fish Recheado

I have to say "Goan" fish recheado. And that does the trick - if you've been to Goa and have fallen in love with it, this dish will take you back to beautiful Goa with memories of lazy lunches, balmy weather, pretty hand printed sarongs, fresh and simple seafood, cane chairs and warm sands. It's heaven on earth.:)

RecheadoFish

Recheado is Portuguese for stuffed.(Google) And this version is traditional Goan food that you'll most definitely find on any menu at Goa, whether you're eating at a makeshift little hut or at an upscale fine dining place. I'm partial to the makeshift places. They always get it right. Evoking just the kind of sensory pleasure that good food should with none of the fancy gadgets and hoity toity explanations. Good food, minus the frills.

I specifically looked for Mackerel as that is what is used in the classic version. But feel free to use pomfret or kingfish if that's easier to find and is fresher. Any firm and white fleshed fish would work well. Mackerel , I found has a strong fishy odour. If you're not game for it, stick to the milder fish varieties.
I remember eating fish recheado made with pomfret many years ago at a lovely family owned restaurant that was highly recommended by the locals, Souza Lobos on Calangute beach. Divine.

FishInTheSea

The recheado stuffing or masala paste has a long list of ingredients. Each of them plays a vital role in bringing out the robust, spicy and lively flavors of Goan food. This dish is really easy to make,looks spectacular and tastes very very good with hot steamed rice. Make sure your fish is really fresh and if you don't want to shallow fry, an open grill would be a fantastic alternative. If you are vegetarian/vegan try toning down the spice levels and stuffing okra with the paste. Delicious.

While I'm typing this recipe out, my toddler is begging me to please throw the fish back into the swimming pool. Funny thing is he didn't seem to mind when he was eating the photograhed fish for lunch. :)

So if you're feeling like taking off to Goa (but really cannot like most of us) this should keep you happy. Temporarily at least.

FishRecheado2

Recipe

Difficulty level - easy
Cooking time - 10 mins.
Marination time - 1 hour. Plus allow time for overnight marination of the spices.
Serves two.

Ingredients

For the masala paste

20 dried red chillies
6 cloves
2 one inch cinnamon pieces
5 pods of cardamom
1/4 tsp of cumin seeds
1/2 tsp of black pepper
20 cloves of garlic
2 inch piece of fresh ginger
toddy vinegar to taste ( use any mildly flavoured vinegar as a substitute)

For the recheado masala

1 tbsp oil
1 tbsp onion, finely chopped
1/2 tsp sugar
salt to taste

2 medium sized whole mackerel, whole pomfret or kingfish slices
juice of 1/2 lime
salt to taste

Method

For the masala or recheado paste

Soak red chillies, cloves, cinnamon, cumin seeds, black peppercorns, garlic and ginger in the toddy vinegar. I soaked them overnight. If you're short on time - one hour would be good enough. Then grind to a fine paste. Keep aside.

Heat oil in a pan. Add the finely chopped onion and saute till golden brown in color. Now add the sugar and salt. Mix well and cook until the raw smell disappears and the paste turns a beautiful deep dark red. You will see the oil separate out. It's done, take off the heat and allow to cool.

For the main dish

Clean the fish and pat the it dry with a paper towel. Make deep gashes on both sides of the fish. Skip this step if you're using fish slices instead of whole fish. Rub the fish generously with salt and lemon juice on both the outside as well as the insides. Stuff the fish with the prepared recheado masala paste. Allow the fish to marinate for 45 mins - 1 hr.

Heat oil in a pan. Shallow fry the fish for 4 - 5 minutes on each side or until it is cooked through and you get a crisp exterior. Serve hot with Goan bread or rice.

Note - Be very gentle while turning the fish over - it tends to break and fall apart.

Tuesday, October 27, 2009

Spaghetti with roasted red and yellow peppers, aubergine and olive stuffed bocconcini

Phew! that was a lot of words for a title. This pasta dish is so versatile - you can toss in any veggie that you fancy and happen to have on hand. It's a hassle free and simple recipe that literally takes minutes to prepare and tastes so good.

Spaghetti with roasted red and yellow peppers, aubergine and olive stuffed bocconcini

I've used what was fresh and easily available at the market on that day. Originally, I planned to make a sauce with these gorgeous green tomatoes that I found. But chickened out at the last moment fearing my toddler would find the green tomatoes too tart. Probably next time around......:)

Nevertheless the dish was simply delicious with each ingredient shining through boldly. Loosely based on a pasta dish - Evelyn's Everything Pasta, that I loved and always got at Cheesecake Factory. I know that CF is not gourmet, but I think the food is pretty decent and they have a sizable number of options for vegetarians. Works for me.

Peppers

The original dish had penne as the pasta, broccoli, eggplants, red and yellow peppers, olives, flat leaf parsley,pine nuts and Parmesan. Feel free to experiment with what ingredients you have on hand. Multitask - cook the pasta while the vegetables are being sauteed or roasted to save on time for a quick week night meal!

Spaghetti with roasted red and yellow peppers, aubergine and olive stuffed bocconcini

Recipe

Difficulty level - Very easy
Cooking time - 30 mins
Serves - Two greedy people

Ingredients

1 pound of spaghetti (Use any pasta that you like)
1 red pepper cut into strips
1 yellow pepper cut into strips
1 medium sized eggplant/aubergine cut into thin slices
2 cloves garlic, crushed
4 tbsp of good olive oil
2 tbsps walnuts ( Use pine nuts if you can find them )
1/2 tsp red chilly flakes
1/2 tsp of dried oregano or dried mixed herbs
10 -12 fresh basil leaves roughly torn apart
4 - 5 bocconcini or mozzarella cut into cubes
2 tsp Parmesan cheese grated

Method

Cook the pasta in plenty of salted and rapidly boiling water for 10 -12 minutes, until al dente. Drain and keep aside. Reserve some of the pasta water. You can get this going on the side while you work on veggies.
Heat 2 tbsp of the olive oil in a heavy skillet or pan and place the eggplant slices in a single layer without overcrowding them. You want them to get brown and crispy on the edges. Do it in batches if you have to, but do not toss all of them in. Season the eggplant slices with salt and pepper. Remove and keep aside.
Alternately you can bake/roast the eggplant slices in 425 F oven for . Just brush the slices with olive oil and bake until lightly browned. You could also roast the red and yellow peppers whole. Once the peppers are charred on the outside, remove and place inside a paper bag and allow them to steam. This allows the skin to peel off easily. When cool enough to touch , remove the skin and slice the flesh into strips.
Heat the remaining olive oil in the same pan. Add the garlic and saute till an aroma is given off. Do this on a low flame, you don't want to brown or burn the garlic but just infuse the oil with all of its flavor. Next add the nuts and heat them till they get crunchy. Add the chilly flakes and dried herbs, the red and yellow peppers and saute till the peppers are tender-crisp. Add the roasted eggplant slices.
Finally add the torn basil leaves and mix gently.
Add the pasta and combine with all of the veggies making sure that the oil coats all the strands and the seasoning is distributed evenly.
If you find that the pasta is too dry you can add a tiny amount of the reserved pasta water to moisten it. Just before serving toss in the cubed mozzarella or bocconcini. Grate Parmesan over the pasta and garnish with more fresh basil leaves. Serve hot with crusty garlic bread on the side.

Friday, October 23, 2009

Matki Chi Usal

Another Maharashtrian classic that is super delicious, nutritious and very easy to put together. I'm starting to like Maharshtrian food a LOT, simply because the ingredients used are few, they are mostly wholesome and hearty and there's not much you do with it! Keep it simple is the underlying theme here.

MatkiChiUsal

Matki or Moth beans are packed with proteins, vitamins and minerals. They have a wonderful nutty flavor and easily take on seasoning of any kind. When you sprout beans and legumes, you amplify all the of the good stuff. Germinating beans produce a battery of super enzymes and phytochemicals that are extremely beneficial for you.

Demonstrated by Chef Johnson at the Taj Blue Diamond in Pune, in a very easy going and logical manner, this recipe is again something I chanced upon when flipping through the channels on the broken TV. Not really broken but it is "broken" whenever my lil one gets too wrapped up in it. It is now in the broken phase for the next two weeks. Mommy cannot fix it as she doesn't have the tools that Handy Manny does, remember?
I know, I know why can't you just say NO? I wish I could. Simply say NO. But I can't, and he seems to understand better when I explain it to him through people of his world. Bad, I know.

MatkiChiUsal2

Sure it does take a little bit of extra effort to soak, drain and then sprout the beans. Just keep telling yourself about how good they are for you. I soaked these beans overnight. Drained the water the next morning and kept them tightly wrapped in a moist muslin cloth in a comfortable humid area. Voila! 12 hours later you see them all - alive and kicking! Too bad you're going to be cooking them and eating them. How monstrous! Stop. They are just beans.

Follow the recipe just as suggested, I didn't make any changes and it turned out real nice. The slightly sweet and spicy hot usal paired well with the soft, light-as-air laadi pav. Serve hot with sliced onions and twists of lime.

MatkiChiUsal3

I'm sending this recipe across to this month's MLLA host - Jeanne, who has a blog filled with beautiful pictures and wonderful recipes MLLA (My Legume Love Affair) event. This event was started by Susan who has a fantastic blog space dedicated to her beautifully thought out recipes and pictures.

Recipe

Cooking time 25 mins.
Difficulty level - Easy.
Serves 2.

Ingredients

1 cup sprouted matki/ moth beans
2 tsp neutral oil
1 tsp mustard seeds
a pinch hing/asafoetida
2 onions, chopped fine
2 tomatoes, chopped fine
1 tsp red chilli powder
1 tsp salt
1/2 tsp turmeric
1 cup water
1 tsp of goda masala( if you can't find it substitute with regular garam masala)
2 tsp roasted peanut, powdered
1 tsp of jaggery
4 tsp fresh coconut, grated
2 tsp coriander leaves
lemon juice to taste

Method

Heat oil in a pan. Add the mustard seeds, hing and onions. Saute till onions are soft and translucent. Then add the chopped tomatoes. Once the tomatoes are soft and cooked through, add the turmeric and red chilli powder. Saute till an aroma is given off, 1-2 mins.
Add the sprouted matki, salt and water. Mix well. Cover and cook till the beans are 80% cooked. Don't cook the beans to a mush, they should be soft but should still hold their shape. Then add the goda masala, jaggery, freshly grated coconut and roasted peanut powder. Mix well and cook for a further 5 mins. Squeeze lime juice according to taste. Garnish with fresh coriander leaves and grated coconut. Serve hot with paav.

Friday, October 9, 2009

Shilpa Akka's Bisi Bele Bath

If you're from Karnataka, chances are you've eaten this signature Kannadiga dish at least once. Bisi Bele Bath, literally translates to Bisi - hot, Bele - is toor dal, a lentil and Bath is a generic name given to seasoned rice in Southern India. It's a one pot meal which incorporates rice, lentils, vegetables and is seasoned generously with what .....you've guessed it Bisi Bele Bath powder.

BBB4

And for those of you who thought it translated to a hot shower with lentils floating around. You are so wrong.....

After typing Bisi Bele Bath for the umpteenth time, I'm switching to the way I've seen some college and school canteens address this dish - BBB or "B cube". "C squared B" is short for Chow Chow Bath, which is not a bath at all! How groovy!

You'll often hear the manager sitting at the token sale counter scream right across the canteen in a loud voice, "Illi ondhu B cube mathu yeradu C squared B kodi......". When translated to English - he's just placing an order of Bisi Bele bath and two orders of Chow Chow Bath . Before this turns into a post about Kannada or amateurish Algebra, let's move onto the recipe.

There are many versions of BBB powder and MTR makes a pretty darn good one. But freshly ground masala - bearing your stamp of authenticity triumphs over opening a pack of store bought powder, any day! This recipe was passed onto me by my sister- in -law and she makes a killer BBB. It comes very close to the versions I've had as Prasada at temples and also to the one that Kadambam used to make. I cannot thank her enough for sharing this recipe with me!

BBB3

If you like BBB - give this recipe a try. A little more work than snipping open a packet of MTR BBB powder but well worth the effort. This is a great dish to make if you're inviting guests who love South Indian Food as it goes a little deeper than the ubiquitous idlis, dosas and vadas. Tastes delicious with happala or potato chips. I'm not sure if pacchadi on the side is authentic but I love it. Makes for a wonderful soothing side and offers you a welcome respite from the spicy rice.

This is a simple and satisfying one pot meal. If you're short on time, by all means go ahead and substitute a store bought powder. Drop me a line if you have any questions or feedback!

BBB2

Recipe

Difficulty level - Moderate
Serves - 4
Time - 1 hr 15 mins

Ingredients

1 cup toor dal
1 cup rice
2 cups mixed vegetable chunks ( carrots,french beans, potatoes, peas, double beans, green bell pepper/capsicum)
1/2 cup sambar onions/shallots or 1 big red onion cut into cubes
3 tbsp Bisi Bele Bath powder/pudi - recipe follows
2 tsp tamarind extract
1/2 tsp turmeric powder
1/4 tsp asafoetida/hing
15 curry leaves
1/2 tsp mustard seeds
4 red chillies broken into halves
10 cashew nuts
4 tbsps ghee

For the BBB masala powder or pudi -

1/2 tbsp black mustard seeds
1/2 tbsp jeera/cumin seeds
A scant 1/2 tsp methi/fenugreek seeds
10 - 15 red chillies
1/2 tbsp black peppercorns
1 tbsp poppy seeds/khus khus
3 1/2" cinnamon sticks
6 - 8 cloves
3 tbsp coriander seeds
1 tbsp chana dal
1/2 tsp oil

Method


To make the masala powder -

Take a heavy bottomed pan and on a very very low flame roast the listed ingredients in the said order using very few drops of oil. Adding too much oil will make the powder greasy and lumpy. Alternatively you can also dry roast.
First roast the poppy seeds - do not brown but just roast enough until they give off an aroma. Remove onto a plate. Next goes the jeera, peppercorns, mustard, methi and dhania seeds. Keep aside. Then fry the red chillies, do not blacken them. Roast the channa dal,cinnamon and cloves.
Remember to never turn up the heat as this would make the powder dark and very strong in odor. You just want to gently roast the ingredients on a very low flame.

When grinding the roasted spices to a powder, start with the poppy seeds first as they are difficult to grind because they are so tiny. Then add the rest of the ingredients and grind to a fine powder. Don't remove the lid of the grinder - you want to trap all the aromas until it's time to use the spice mix.

For the Bisi Bele Bath -

1)Wash and soak the rice and dal separately for 20 mins.
2)Pressure cook the rice and dal in separate containers until the cooker gives off one whistle. Continue to cook after lowering the flame for an additional 5 mins. Switch off.
3)Take a thick bottomed large pan or cooker which can easily hold the BBB as it tends to get voluminous. Heat 2 tsp of ghee. Add the vegetable chunks and the onions, salt, hing and turmeric powder and saute for 2 mins. Add a little water and 3 tbsp of the prepared powder. Cover and cook until the veggies are slightly soft.
4)Add the cooked rice an dal. Add tamarind extract and salt to taste. Mix well so the seasoning is uniformly distributed. Add sufficient water to get a slightly flowing consistency. Similar to the consistency of khichdi or risotto.Cook for another 5 - 10 mins and let the flavors meld together.
There is no hard and fast rule here. You can add more or less tamarind extract, BBB powder and water to get it to taste exactly the way you want it to.
5)Finally for the vogarane/tadka - Heat 4 tbsps of ghee(use more if you like!) add the mustard seeds, curry leaves, red chillies and cashews fry until they give off an aroma and the cashews are golden brown in color. Pour onto the hot rice.
6)Serve immediately with potato chips or happala.

Tuesday, October 6, 2009

Malaysian Tofu Satay with Peanut Sauce

Satay or Sate are little strips of skewered meat,chicken, fish or tofu that are usually grilled over a charcoal fire. None of my previous attempts at home made chicken satay could have prepared me for the delicious taste of real satay at a street hawker stall in Kuala Lumpur. I was surprised at how thin the chicken strips were. They were literally tiny morsels of super moist, flavorful, very lightly and beautifully spiced chicken. Every little bite was packed with the fragrance of lemongrass, coconut milk undertones and the smokiness from the charcoal grill. Rustic and succulent.

Satay3

The chicken satay was served alongside tiny wedges of steamed rice cakes and a savoury sweet sauce which was sharp but in a pleasant kind of way. I was hooked! And I made it a point to eat them every day for the rest of the vacation. Gluttony.

Having turned vegetarian for close to three years now, I occasionally do a tofu - take on traditional recipes. So when I saw these perfect looking tofu skewers on Susan's wonderful blog, I just had to make it......with much hindrance from S.
Tofu satays??? I could tell that the meat-atarian husband wasn't thrilled. I usually get this reaction when I substitute tofu or beans or potatoes for chicken or meat or fish - in an "otherwise great recipe" that wasn't meant to be made with Tofu( according to him).

Satay1

But then he loved them and asked that I make these again for his friends at a dinner next weekend. This is definitely an easy breezy appetizer to make when you have company. As all you have to do is whizz the marinade together, slice up and marinate the tofu and leave it the fridge until you're ready to grill them up!

I made my own version of the peanut sauce, as I didn't have the time to follow the suggested recipe. This recipe is based on the peanut sauce usually served at Thai restaurants in the USA. I loved the peanut sauce and it was great on toast for breakfast the next day!

Satay5

Recipe

For the tofu satays look for the original recipe here and for Susan's clever modifications here .

Easy Peanut Sauce - recipe follows

Ingredients

4 tbsps of chunky/creamy peanut butter or 1/2 cup roasted and skinned peanuts
1 tbsp of lemongrass chopped
2 shallots
1 tsp of soy sauce
1/2 tsp of sugar
8 dried chillies + 1 clove garlic soaked in 1 tsp of vinegar overnight

Recipe

Simply blend the ingredients together and taste for the right balance of flavors. Adjust seasoning accordingly.

Note - soak the bamboo skewers overnight in water to prevent them from burning or getting charred when grilling.
I didn't grill these satays, I just pan fried them on a hot, lightly greased griddle on all four sides until cooked through and browned on the outside.

Thank you Susan for sharing this delicious recipe!

Friday, October 2, 2009

Mango Mousse with Saffron and Pistachio

I'm happiest when I bake a batch of cookies or whip up a good dessert. It's magical to see a few ingredients that were just lying on your table turn into something as luscious as the Alphonso mango mousse that I made yesterday. At 2 a.m no doubt. For those of you who know me real well, it shouldn't surprise you at all.(read CBD)

MangoMousse4

When I fall asleep at night my brain is usually clicking away thinking about flavors and combinations and cool new ideas to experiment with in my kitchen. It's more interesting than counting sheep. Trust me - try it and you'll find going to bed on a sweet note helps.

Discovered this beautiful bottle of organic Alphonso mango puree. Divine just by itself. It's being made and sold by AshtaVinayak Farms. One tiny taste and you can tell that it's good stuff. Amazingly good stuff, sans that metallic taste which I swear I can detect sometimes in canned fruit and it has the most gorgeous vivid orange you can imagine. It's liquid gold. That's what it is.

The mousse turned out perfect. Of course it should when you follow the recipe on this fairytale blog Tartelette by Helen - genius beyond compare . I then topped it with a saffron and mango sauce. Chopped pistachios were added for a difference in texture and a whopping green that contrasted perfectly against the mango-ey orange color.

MangoMousse3

The recipe for the Mango Saffron sauce is as below. Any modifications for the mousse recipe from my end? None, except that I always (out of a habit mostly) strain the fruit puree after adding in the gelatin. Just to catch any lumps and grits. Follow the original recipe for the mousse. The mango sauce goes on the mousse after the mousse has firmed up a bit(this about 2-3 hours in the fridge). Return to the fridge after topping the mousse with the sauce and chill for at least 4 - 6 hrs or until firm. The nuts are added just before serving or they'll end up being soggy.

This was very easy to put together. The mousse was delicious - light and airy. Ringing with the Alphonso goodness. Definitely going to be making this again. More than once for sure.

MangoMousse2

Here are some additional notes for my readers who are making a mousse for the very first time.

You don't need an electric beater to whip the cream. So don't fret if you don't have one.(It helps a LOT though).I have whipped cream using just a hand whisk and it works just fine. It just takes a little longer and more muscle effort.
Make sure that the cream is well chilled. And if you live in an area where it's exceptionally warm, use an ice bath to hold the bowl in which you whip the cream to help the cream whip up easily.
Gelatin dissolves better when left to bloom. To bloom gelatin add water and allow it to rest and absorb the water. The crystals will be spongy and water laden. This takes about 10 mins.

MangoMousse1

Recipe

Saffron Mango Sauce

Ingredients

10 strands of good saffron
1 tbsp of hot milk
4 tbsp of mango puree

Method

You can make this sauce right after you make the mousse. Chill the sauce until the mousse has firmed up a bit, top it with a layer of the sauce and return to the fridge to chill for 6 hours or until firm.
Soak the saffron in the hot milk for 20 mins. Allow the mixture to come to room temperature. Mix in the mango puree. If the fruit that you're using is not sweet enough, add a tsp of sugar.

And now you're in mango heaven. Amen.

Tuesday, September 29, 2009

Urad sabat

Urad sabat or Punjabi kali dal is a staple lentil in the Punjabi kitchen. It's taste and depth of flavor is unmatched. There are no fancy overpowering flavors here but just the wholesome toothiness of the lentil against the mildly spiced, rich, lusciously cooked down and thickened lentil itself.

UradSabat2

Urad sabat is whole un-husked black gram dal(urad/udad/udid dal). It is nutritious, packed with energy and rich in proteins. When allowed to simmer over a long period of time, it tends to achieve a slightly slimy and thick consistency. Characterized by it's beautiful earthy flavor and a rich brown color, this dal is the queen of slow cooking! And you know just how good slow cooked food tastes...... every little lentil in this dish is given enough time and love to ripen and dissolve into perfection.

I remember seeing huge cauldrons of kali dal gently simmering away on a log fire at a dhaba in Delhi. Perfect, bellywarming food on a nippy December afternoon. Left outside to cook over a log fire for over 12 hours, the dal has an unmistakable aroma and fragrance which you just cannot reproduce with your gas or electric stove. All that soot,smoke and the fruity wooden logs flavor the food in a unique way. Visits to the village where my grand parents made their home reminds me of the food - it had the same fantastic taste and smelled so good. It was partly because of the freshness of the ingredients and also because ajji (My dad's mother) used to cook over a vole or a small log fire. And of course a whole lotta love that she put into it. :)

KaliDal2

Don't be overwhelmed by the long cooking hours for this dish. As the efforts are well rewarded even by using your pressure cooker and reducing the cooking time by a great deal. The dal is fragrant and hearty and tastes oh so good with phulkas or rotis.

This recipe is from a book on Punjabi Cooking by Premjit Gill that I found in our attic. It was first printed in 1986! So I'm guessing nothing has changed about the way this beautiful lentil is cooked as most recipes that Google brought back were roughly the same. Although I did modify the recipe a wee bit after I was influenced by other recipes that I read and also some secrets that my neighbor shared with me.

Be forewarned that you only venture into making this dish when you have lots of time on hand. Not active cooking time, but you know the "let it simmer till it cooks down to a beautiful lush consistency" time. This dish took waaaaay longer than what the recipe promised. But it wasn't like I was slaving over it or anything. I just had to check on it occasionally to make sure that there was enough water to keep it from burning and sticking to the bottom. That reminds me - you have to use a thick bottomed vessel for this one.

KaliDal1

I'm sending this recipe across to the very talented author, Sia of the gorgeous food blog - Monsoon Spice for the 15th helping of the MLLA (My Legume Love Affair) event. This event was started by Susan who has a fantastic blog space dedicated to her beautifully thought out recipes and pictures.

MLLA15Logo375

On to the recipe. Please look at the notes section for additional tips.

Recipe

Ingredients

For the dal :

1 cup urad sabat/ udad saboot/ whole un-husked black gram dal
1 tsp salt
1 inch piece of ginger, chopped fine
8 cloves of garlic, chopped fine or crushed
1 large onion chopped fine
10 cups of water
1/2 tsp of red chilli powder
1/2 tsp of turmeric powder
1/2 tbsp ghee

For the tarka

3 tbsps of butter/ghee
1 medium sized onion, chopped fine
1 medium tomato grated
1/2 tsp of garam masala
1/2 tsp cumin seeds
1/2 inch piece of ginger grated
3 green chillies chopped

4 tbsps of cream for a final flourish! (It's optional but it won't taste the same without it)

Method

Clean, wash and boil the dal in 10 cups of water. When boiling add the salt, ginger, garlic, onion, red chilli and turmeric powder and ghee. Cover and pressure cook for 1/2 hour. Then let the pressure drop. Uncover and allow to simmer on a low fire while you prepare the tarka.

Tarka

Heat the ghee/butter, add the ginger,chopped onion, garam masala, cumin seeeds and fry till light brown. Add green chillies to the simmering dal. Cook another 1/2 hour or until a thick consistency is reached. Serve hot with yogurt, plain rice, parathas or phulkas.


Notes : Here are my modifications to the recipe. The recipe didn't call for it but my neighbor was horrified that it didn't. "You have to soak it or it won't cook!" - the urad was soaked overnight for 10 hours. I then pressure cooked the dal for nearly an hour instead of the recommended half hour. And the simmering to reach the right consistency took another hour. A medium sized tomato was grated and added to the tarka to cut through the dal. This recipe makes a LOT of dal. Serves eight people, so you can easily halve the recipe if you need to.

Thursday, September 24, 2009

Dan Dan Noodles

Remember that ad "Don't be a noodle.......be a smoodle....".What on earth am I talking about? Well I ran out of good introduction ideas for the noodle recipe that I'm posting about .......so this is my very lame introduction to a popular Chinese street food. This recipe had been bookmarked to try out for a lazy afternoon lunch a couple of weeks ago. So when a really bad craving for Chinese food hit me, but I didn't want to make something elaborate for just my toddler and me it was a perfect recipe to experiment with. Quick to put together, with a countable number of ingredients, bursting with flavors and hitting all your senses like good street food should, I present thee - Dan Dan Noodles.

DanDanNoodles

This recipe is from Helen Chen's book titled "Chinese Home Cooking". I'm not sure why I picked this recipe out of 300 odd authentic Chinese home style recipes. But I'm glad I did. You'll love this recipe if you like the ideas of noodles doused with a peppery hot, salty and sweet peanut sauce.

In her book Helen has a small introduction or an interesting note about every recipe. Whether it was a family favourite, something that takes her back to her childhood dinner parties, stories from China or a historical note on the origin of the recipe. Gives the book a personal touch that I love. The following are her words on this recipe.

DanDanNoodles2

"Dan Dan Noodles are Szechuan street food at it's most traditional. Dan dan refers to the thumping sound made by the pails of noodles and sauce at the ends of bamboo panniers as they are carried through the streets in a sort of travelling fast food restaurant.The noodles are served cold or tepid.Once assembled,the dish holds well, although the noodles absorb the sauce after an hour. If you like saucier noodles, dress them just before serving. I sometimes add blanched and shredded snow peas or blanched bean sprouts along with the scallions for texture"

This recipe was modified to suit what I had on hand, please take a look at the note below for modifications. Also I honestly felt the noodles tasted better after I allowed them to soak in the peanut dressing for about 6 hours.(Evening snack for me yum yum) The next time I make this I would definitely make and dress the noodles in advance so they soak up all of that lovely piquant peanut sauce.

DanDanNoodles3

Recipe

Source : Helen Chen's "Chinese Home Cooking"

Ingredients

1 pound thin spaghetti
2 tbsps sesame oil
3/4 cup creamy peanut butter
3/4 cup Vegetable broth or water
2 tbsps light soy sauce
2 tsp chili oil, or to taste
1/4 tsp cayenne,or to taste
1 heaping tsp of Szechuan peppercorns, toasted and ground - Didn't have any so I substituted with a big pinch of white pepper and 1 tsp of red chilli flakes
3 scallions, white and green parts, thinly sliced

Method

Bring 4 to 5 quarts of water to a boil. Add the noodles and cook uncovered until a little more tender than al dente. Avoid overcooking or the noodles will be mushy. Stir occasionally to keep the noodles from sticking together. when done, drain and rinse with cold water until thoroughly cool.Drain well, transfer to a large serving bowl and gently toss with 1 tbsp of sesame oil(hands work best).Set aside.

While the noodles are cooking,blend together the peanut butter and broth in a bowl until smooth and creamy.Add the soy sauce, chilli oil, the remaining 1 tbsp of sesame oil,the cayenne and Szechuan peppercorns. Mix thoroughly.If you have time let the sauce sit for 30 mins or more to allow the spices to develop.

Pour the peanut paste over the cooked noodles and add the scallions.I use my hands to toss the noodles because they mix the ingredients more evenly and the noodles don't break.Serve cool.

Variation - For a vegetable garnish, add blanched snow peas and bean sprouts to the noodles with the scallions.

Note - I have slightly altered the recipe as I couldn't find some of the ingredients. Instead of the Szechuan peppercorns I added chilli flakes and white pepper. The recipe originally called for chicken broth but water worked just fine. Also to give it a bit of a kick and zing I added about 1 1/2 tbsps of hot sauce.You can use Sriracha if you have it on hand. Or good old Maggi Hot and Sweet sauce will work in a pinch. 1 tbsp of vinegar was added to cut through the creaminess of the peanut butter. The toasted sesame seed garnish was mainly to make the picture pretty but 'twas a good addition as they added crunch and nuttiness to the dish.

Wednesday, September 23, 2009

Bharli Vaangi

Are you tired of serving your vegetarian guests paneer, paneer and more paneer? Do I sound like those really loud and obnoxious TV commercials trying to sell you stuff that you never ever thought you would need? I guess I do. At least when I read this out loud to myself I do. Well here's a "new" recipe which is different from the usual garam masala and cream laced tomato gravy deals. Bharli vaangi is a traditional Maharashtrian dish and it translates to stuffed brinjals or eggplants.

BharliVaangi

Ever since I've moved to Pune I've been wanting to try out the local fare and learn how to cook authentic Maharashtrian food. This recipe caught my eye on TV. It was presented by the head chef of the Taj Hotel, Mumbai. I scrambled to find my recipe note book and didn't find a pen but I managed to scribble it all down with an old worn out orange crayon. Pens are always kept safely away from my toddler (and me too I guess) who is just discovering the joy of doodling on everything. When I say everything I really mean that. His belly button, the TV screen, my driver's license the TV remote, the back of his ears, the apple symbol on his dad's computer - you name it.

Back to the recipe - this simple recipe has few ingredients and a short and straightforward cooking method. The eggplants are tender and bursting with their own juices. They are slightly hot from the goda masala, tangy from the tamarind and sweet from the jaggery. What is Goda masala? It is an authentic Maharshtrian garam masala widely used in Maharashtrain cooking. If you can't find it you can substitute with regular garam masala. Here is a excellent post from Shilpa of Aayi's Recipes where you can learn to make your own goda masala.
I loved how different this dish tasted from everything that I've made or usually eaten at buffets or parties. It's definitely going to be the surprise dish on my menu when I have guests over.

Eggplants

Make sure that you use fresh brinjals for this dish. Older ones tend to be bitter. I've made this with the green Thai eggplants as well as the purple ones. I preferred the purple ones.

Here's the recipe, follow it to the T and you won't go wrong. That is exactly what I did and it was super delicious. You can serve this with roti or bhakri. Bhakri is a flat bread made with jowar flour. Look out for a future post on how to make bhakri.

BharliVaangi2

I was requested by one my readers to indicate the level of difficulty on the recipes that are posted on this blog. Henceforth all recipes will be categorised as easy, moderately easy and tough cookie. Have fun!

Recipe

Difficulty level - easy
Cooking time - 25 mins

Ingredients

8 small brinjals
4 tsp of oil
1/2 tsp cumin seeds
a/2 tsp mustard seeds
2 tsp tamarind water
2 tsp jaggery syrup
1 cup water
salt to taste

For the masala stuffing

6 tsp of dessicated coconut/kopra
4 tsp of roasted and crushed peanut powder
1 tsp of red chilli powder
1 1/2 tsp of goda masala( you can use regular garam masala if you don't have any)
salt

Method

1)Make + shaped incisions on the brinjals deep enough to get the stuffing in but don't break them open.
2)Make the stuffing by mixing together all the ingredients listed under stuffing.
3)Stuff the brinjals with the stuffing and keep aside.
4)Heat oil in a pan and add the cumin and mustard seeds. When they begin to splutter gently slide in the brinjals and saute for 2 - 3 mins. Add a cup of water and lower the flame. Cover and cook for 10 -12 mins.
5)After the brinjals are fork tender add the tamarind water,jaggery syrup and salt to taste. Keep in mind that the stuffing has salt added in as well.Stir well and evenly distribute the seasoning. Remove from the flame.
6)Garnish with coconut shavings and fresh coriander. Serve hot.

Yay! you've cooked your first authentic Maharshtrian dish!

Thursday, September 17, 2009

Fried Chicken

Fried chicken is comfort food personified. Crispy and crunchy on the outside, soft and succulent on the inside. Most people can't resist the calling of fried chicken. There are numerous versions of it and I'm sure every cuisine and culture has its signature way of making it. One that immediately comes to mind is the fried chicken classic - Southern Fried Chicken - lightly breaded and fried to a golden crisp after being marinated in buttermilk that gives it a juicy and tangy taste.

FriedChicken1

My version of fried chicken is asli desi with a characteristic red color but not the kind achieved by artificial coloring. The marinade itself has very few ingredients and the most vital is the chilli powder which gives this chicken a hot and smoky flavor. This is the way my grandma or awwa as we would fondly address her used to make it ever since I can remember. It's one of those dishes that jazzes up a simple meal of just rice and dal, it's fantastic as an appetizer and can still hold it's own when served alongside biryani.

With this version of fried chicken the longer it marinates - the better it tastes. And since the marinade is ridiculously easy to put together you can just mix it up, refrigerate it and forget about it. And while you go about doing your stuff the marinade is working it's magic on the chicken. Yumm- O.

Fried Chicken

The chilli powder that this recipe calls for is plain ground dried red chillies. Note - this is different from chili powder that is used to season American chili. The lime in the marinade helps cut the grease and soften the chicken. Turmeric helps remove that chicke-ny odour. A teaspoon of oil added into the marinade helps keep the chicken moist. Don't be alarmed at the large quantity of chilli powder being used here. Trust me, after you're done frying the chicken the heat from the chilli has mellowed down quite a bit. So it's not insanely hot - which you would expect looking at the proportion of chilli being used. It has a pleasant bite to it. Nevertheless this is still a dish for people who love hot food.

Speaking of hot food and people who just cannot tolerate it reminds me of my dear friend M. (I know I know a lot of you lovely readers gave me feedback saying "What's with this whole dear friend thing?" But how else can I say this? I guess next time I'll look for a better phrase, until then.....dear friend it is.) She's a very sweet lady who helped me adjust so well to a new city and a new country. Most importantly she made me feel so much at home and took such good care of me when I needed it the most. They are one of the nicest couples we've met and befriended, very welcoming about the fact that we came from a different country - our food was different and our culture was different. So one fine day we decided to have them over for dinner. Both of them love Indian food and she also mentioned that she was especially fond of palak paneer. So what did yours truly do? But of course make palak paneer........ with about 10 extremely hot thai bird chillies ground into the spinach sauce. To me it was just an ordinary green chilli that we find at India. There was no way of fishing it out!

Fried Chicken

Well she was nice enough to swallow a few morsels of it before she had to run to the restroom. A few minutes later she emerged with tears streaming down her face! After a few bowls of vanilla ice cream and plain naan bread(which was all that she had for dinner - I know....... I'm awful) she was back to her old self willing to give pani puri a try the next weekend. Lesson learned - thai chillies are potent.

I'm sending this recipe across for the monthly Think Spice event which focuses on a spice a month and this month's theme is red chillies. Red chillies can be used in fresh, dried, whole or powdered form.
This event is being hosted by Lakshmi Venkatesh who blogs at this beautiful blog Think Spice - Think Red Chillies.
Think Spice was started by the very talented and gracious Sunita Bhuyan of Sunita's World.

I had previously forgotten to also link to Archana's Mad
Tea Party
where she's hosting a Party Event in which the recipe entry should have less than six ingredients. What a great idea for cooks who are short on time and still want to entertain!


Here is red chilli in its most unadulterated and star-of-the-show form.

Recipe

Ingredients

1 kilo or 2lbs chicken cut into smallish pieces
3 - 4 heaped tbsps of red chilli powder
1 tsp of turmeric powder
1 large lime/lemon juiced
1 tbsp of neutral tasting oil
salt to taste
Oil for frying for chicken. Neutral in flavor - peanut or vegetable oil works best.

Method

1)Wash the chicken and pat dry. Keeping the surface of the chicken dry helps it absorb the marinade better.
2)For the marinade - mix together the chilli powder, turmeric powder,salt, lemon juice and oil. Make a thick paste.
3)Rub this marinade all over the chicken and let it rest in the fridge, overnight for the best flavor. If you don't have that kind of time, allow to rest for 2 hrs at least.
4)Deep fry the chicken in batches taking care not to overcrowd the pan. Maybe about 5 - 6 pieces at a time on a medium flame until they attain a uniform dark red color all over.
5)Serve hot with a generous squeeze of lime.

Monday, September 14, 2009

Penne with Basic, Awesome Tomato sauce

The crazy Domino's pizza ad has my toddler enamored with pasta. He will eat pasta for breakfast, lunch and dinner if I let him. So instead of ordering in I decided to make some of the Basic, Awesome Tomato sauce that Deb from Smitten Kitchen promised was .....well, basic and awesome. And it was AWESOME.

PenneWithBasicAwesome

I always always always trust Deb when it comes to recipes that work. She has useful tips and hints and has tried and tested the recipe out completely with step by step pictures and instructions. Her recipes never disappoint....however lofty and expensive the ingredient list.

One bite - and the sauce took me right back to a fresh tagliatelle with tomato sauce dish that I had at a charming Italian restaurant in Soho. Considering that I practically thrived on not-so-stupendous pasta dishes while eating out at some places that were not vegan/vegetarian friendly it was quite impressive that it didn't taste like sauce that came out of a jar.

Italian food, even when it is vegetarian tastes simple,clean and delicious. It's primarily because the cuisine relies essentially on the freshness and natural flavors of the ingredients. You can taste the tang of the tomato,the fruitiness of the olive oil with just enough heat from the dried chilli pepper flakes and a hint of garlic. No one condiment stands out or overpowers the other. It is a beautiful marriage of all the flavors and they all live together in harmony and happiness. The only thing that was missing was a good shaving of Parmesan. But I didn't miss it all that much as the sauce more than made up for it.

PenneWithTomato

I found that this sauce also freezes well and keeps fresh for up to a week in the fridge. Infinitely flexible too - you can thicken the sauce,tear and toss a few fresh basil leaves and voila! what have you here - a decadent pizza sauce. Also pairs well with cheesy garlic bread, as a dip for fried mozzarella sticks and forms a great base for a pink sauce when some fresh cream is swirled in.

For the pasta - this sauce works with both fresh and dry pasta. Cook according to package instructions and as a rule don't overcook the pasta. The pasta should be cooked al-dente. Typically takes about 10 - 12 mins of rapid boiling in plenty of salted water.

This recipe henceforth is going to be my go to for a Basic and very Awesome Tomato sauce. Instead of paying the pizza delivery guy a ton of money for something that won't come even close to tasting as good as this - let's get cooking!

Note : I modified the sauce a wee bit by adding some dried herbs - basil on one occasion and dried oregano on another. They both tasted equally good. I highly recommend the herbs for an additional Italian flavor boost.
Also as the tomatoes that I used weren't as red and plump and juicy as I would have liked them to be, I added about 3 tbsp of tomato puree that you can buy in a tetra pack at the grocery store. It gave the sauce a thick and rich red tomato-ey glow.
The white wine was omitted in my version of the sauce. I substituted with plain old regular water.

PenneWithTomato2

Recipe

Source : Smitten Kitchen

Moderately Easy Tomato Sauce

A more involved, seasonal update of the Basic, Awesome stuff.

Makes enough for one small/medium pizza.

4 roma tomatoes
1 to 2 tablespoons olive oil
2 cloves of garlic, minced
Pinch of red pepper flakes
Splash of white wine
1/2 teaspoon sugar
3/4 teaspoon salt

Bring medium pot of water to a boil. Poach the tomatoes for one minute only, and then drain them. As soon as they are cooled off enough that you can touch them, peel them. The peels should come right off. If they don’t, make a slit in the skins. This always does the trick.

Drain and dry the pot. Put it back on the burner over medium heat. Pour in olive oil and let it heat completely before adding the garlic and stirring it for a minute with a wooden spoon. Add the red pepper flakes and stir it for anther minute. You do not want the garlic to brown. Put the peeled tomatoes in the pot, along with the wine, sugar and salt. Break the tomatoes up with your spoon.

Let the sauce simmer for about 30 minutes, stirring occasionally, until the tomatoes break down. Carefully taste without burning your tongue and adjust seasonings, if necessary.

Wednesday, September 9, 2009

Pudinawale Aloo Paratha

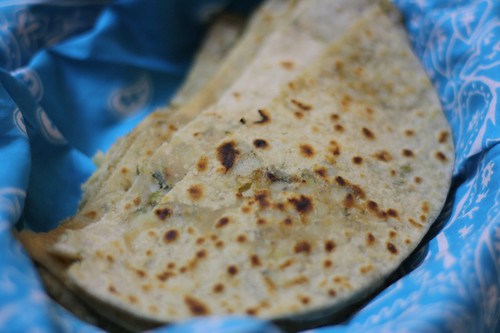
A paratha is an unleavened Indian flat bread that is commonly eaten at breakfast,lunch or dinner. Parathas start with hand kneading a whole wheat dough, that is then portioned off into small balls that are eventually rolled out into circles. These breads are then cooked on a hot griddle or baked inside a tandoor.

AlooParatha

Parathas are often stuffed with vegetables, lentils or meat to make a complete meal and thereby bypassing the whole hullabaloo of making an accompaniment to be served alongside plain old rotis. They are also an ingenious way to use up leftovers.

The Aloo paratha is a signature stuffed paratha bread. Albeit a hearty and filling bread but it hails from the land that is abundantly blessed with wheat and dairy - the Punjab. This region is often subject to harsh winters and agriculture is an important source of income for many families. So when you head out to work on a cold wintry morning you want to have a bellyful of good, hearty and wholesome energy giving food.

Parathas are not very common in the southern part of India where rice is more of a staple. But you do find some versions of it like the Ceylon paratha, the Malabar paratha and such. They are commonly served at restaurants that dot the highway. These parathas are layered and flaky and are served with a rich curry on the side.

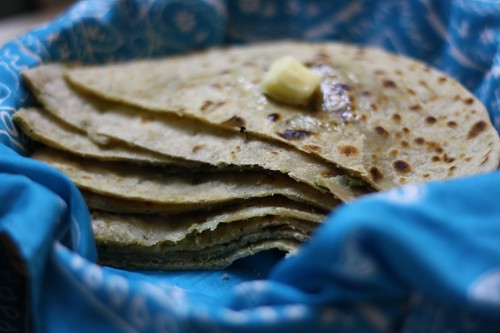
Lalitha's Paratha Point close to Commercial Street at Bangalore is one place that assures you that they serve you authentic Punjabi parathas. The best parathas that I've ever had were at a small Dhaba on a highway from Delhi to Jaipur. They were thick and flaky, and the filling was robustly spiced but still not overpowering or greasy. Of course there were generous lashings of white butter accompanying it. But one paratha is all it took to keep us a group of well fed happy travelers.

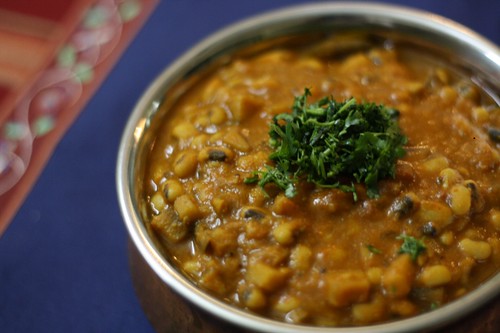
Well to be honest with you I'm not a very authentic paratha maker. So don't go launch into an Aloo paratha competition with your old Punjabi neighbor aunty with this recipe. However I have stuck to the basic concept of spiced potatoes stuffed inside a bread. I've played around with the seasoning and spices depending on what I have on hand. This version is especially a breeze to make when your pantry and fresh vegetable source is dwindling down to look like old mother Hubbard's cupboard. It makes for a complete,satisfying and delicious meal when served with yogurt and mango pickle.

Surprisingly for my veggie hating toddler this goes down pretty well. Well....... does tomato ketchup count as a veggie? No? But.....it is bursting with lycopene and has all these antioxidant benefits. Still no?
Okay okay to get your little one to love this - just reserve some of the stuffing before tossing the green chillies in. Grate some carrots into this reserved portion. When you're making his paratha just griddle it as usual making sure to grease only one side of the paratha. You can up the protein content by adding some cheese. On the dry side grate some mozzarella or cheddar and fold over into a half moon. Press down and cook well on both sides till it crisps up and the cheese is all gooey and melty inside. Cut into three or more triangles and serve with the only veggie he thinks he's eating - the tomato ketchup . Hee hee. Evil.

ButteredAlooParatha

Recipe

Ingredients

For the outer covering of bread

2 cups of whole wheat atta or flour
1 cup of water at room temperature
1/2 tsp of salt
1 tsp of oil

For the inner potato/aloo stuffing

4 medium potatoes
1 tsp of ginger finely grated or minced
2 tbsps of fresh mint leaves, finely chopped
1 tbsp of fresh green coriander leaves, finely chopped
8 hot green chillies, finely chopped
1/2 tsp of ajwain or carom seeds
1/2 tsp of amchur powder
1/2 tsp of garam masala powder
1/4 tsp of cumin/jeera powder
1/4 tsp of coriander/dhania powder


Method

To make the atta or dough

1)In a large mixing bowl measure out two cups of the atta or whole wheat flour. Add the salt and mix well using your hands to distribute the salt evenly across the flour.
2)Add the oil and mix gently using your fingertips to get a an uneven crumbly texture.
3)Add the water in gradually. Do not dump the whole cup of water in as you can't take it out but you can always add more in if your dough seems dry. See note below.
4)Knead well to form a smooth supple dough. This should take about 5 - 7 mins.
5)If you don't plan on using the dough right away you can add an extra 1 tbsp of water while kneading the dough and refrigerate the dough. It will keep fresh for up to 2 days.
6)Cover and set aside for about 20 mins before rolling the parathas out.

To make the potato/aloo stuffing

1)Pressure cook the potatoes in a double boiler mechanism i.e the potatoes are in a bowl that sits in a simmering water bath inside a pressure cooker. Don't add the potatoes directly into the water. Another option would be to microwave them till they are soft. Boiling the potatoes is a no-no as they soak up a lot of the water and the stuffing tends to get slimy.
2)When the potatoes cool enough to touch, remove their skins and grate them.
3)Heat a thick pan and add the oil when the oil is hot but not smoking add the carom/ajwain seeds roast for about 5 secs before adding the finely chopped chillies and grated ginger.
Add the cumin and coriander powders and quickly stir them about without burning the mixture.
3)Toss in the grated potatoes along with the salt and mix well so that the mixture gets a uniform distribution of the salt and spices.Take away from fire.
4)Add the amchur and garam masala powders and mix well.These are added at the very end as they lose their flavours when subject to high heat.Lastly add the fresh mint and coriander leaves.
5)Refrigerate for at least half an hour to make the stuffing easy to work with. I recommend this step highly - especially if you're trying your hand out at this for the very first time.

To make the actual paratha itself

1)Divide the dough into golf ball sized portions.
2)Roll them into medium sized circles maybe about 6 inches in diameter or the size of a CD.
3)Take about 2 heaped tablespoons of the stuffing and shape it into a ball.
4)Place the stuffing at the center and gently gather the edges and twist to form a money bag shape. Remove any excess dough that sticks out.
5)Roll gently to form a ball. Roll out these stuffed dough portions with a rolling pin gently making them as thin and circular as possible without forcing the stuffing out. They can be up to 1/4 inch thick.
6)Grease a thick griddle or a tawa and heat on a medium flame. Gently lower the rolled out paratha onto this. Grease on both sides and cook well till you see uniform brown dots all over the bread.
7)Keep warm until it time to serve.

Additional notes to help your parathas turn out great!

1)Rest and refrigerate the dough and stuffing for at least 2 hours. This makes them easier to handle and roll out.
2)When making the atta or bread dough don't follow recipes to the T. Different flours absorb different quantities of water. It all depends on how fine the wheat is ground. Watch for signs where you think the dough has had enough or too little water. Eye ball it.
3)The flour used impacts the texture and flavor of the bread. I gues that was obvious and unnecessary to say but I can't resist. What I'm trying to say here is use good quality atta. We use Aashirwad atta at home. It's pretty good. Your store help should be able to guide you on this. The next best thing is to actually grind your own flour at a mill nearby......but that's a completely different story saved away for another post.