Tuesday, October 27, 2009

Spaghetti with roasted red and yellow peppers, aubergine and olive stuffed bocconcini

Phew! that was a lot of words for a title. This pasta dish is so versatile - you can toss in any veggie that you fancy and happen to have on hand. It's a hassle free and simple recipe that literally takes minutes to prepare and tastes so good.

Spaghetti with roasted red and yellow peppers, aubergine and olive stuffed bocconcini

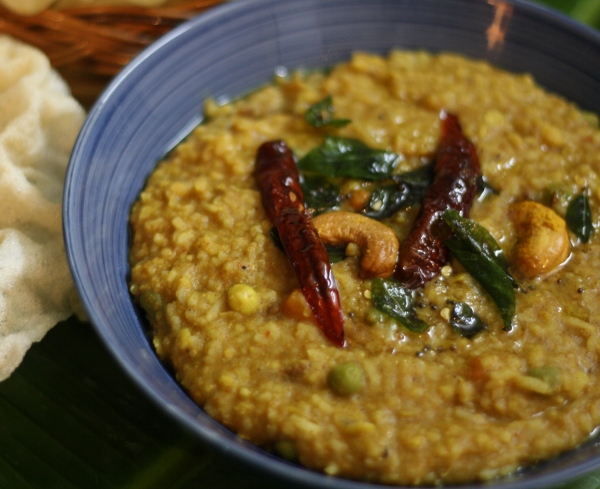
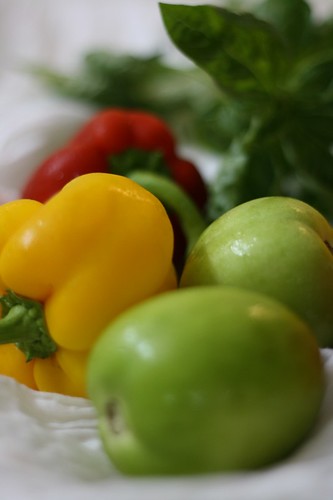
I've used what was fresh and easily available at the market on that day. Originally, I planned to make a sauce with these gorgeous green tomatoes that I found. But chickened out at the last moment fearing my toddler would find the green tomatoes too tart. Probably next time around......:)

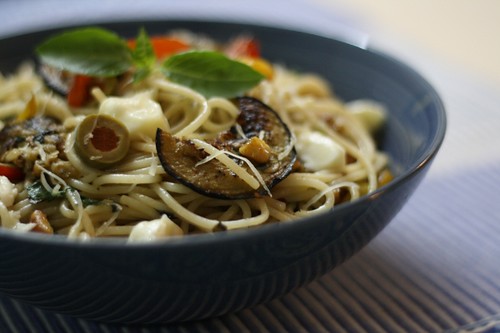
Nevertheless the dish was simply delicious with each ingredient shining through boldly. Loosely based on a pasta dish - Evelyn's Everything Pasta, that I loved and always got at Cheesecake Factory. I know that CF is not gourmet, but I think the food is pretty decent and they have a sizable number of options for vegetarians. Works for me.

Peppers

The original dish had penne as the pasta, broccoli, eggplants, red and yellow peppers, olives, flat leaf parsley,pine nuts and Parmesan. Feel free to experiment with what ingredients you have on hand. Multitask - cook the pasta while the vegetables are being sauteed or roasted to save on time for a quick week night meal!

Spaghetti with roasted red and yellow peppers, aubergine and olive stuffed bocconcini

Recipe

Difficulty level - Very easy
Cooking time - 30 mins
Serves - Two greedy people

Ingredients

1 pound of spaghetti (Use any pasta that you like)
1 red pepper cut into strips
1 yellow pepper cut into strips
1 medium sized eggplant/aubergine cut into thin slices
2 cloves garlic, crushed
4 tbsp of good olive oil
2 tbsps walnuts ( Use pine nuts if you can find them )
1/2 tsp red chilly flakes
1/2 tsp of dried oregano or dried mixed herbs
10 -12 fresh basil leaves roughly torn apart
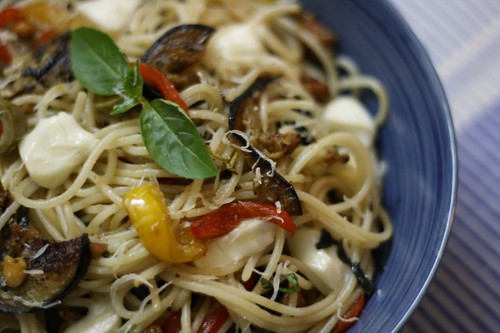
4 - 5 bocconcini or mozzarella cut into cubes
2 tsp Parmesan cheese grated

Method

Cook the pasta in plenty of salted and rapidly boiling water for 10 -12 minutes, until al dente. Drain and keep aside. Reserve some of the pasta water. You can get this going on the side while you work on veggies.
Heat 2 tbsp of the olive oil in a heavy skillet or pan and place the eggplant slices in a single layer without overcrowding them. You want them to get brown and crispy on the edges. Do it in batches if you have to, but do not toss all of them in. Season the eggplant slices with salt and pepper. Remove and keep aside.
Alternately you can bake/roast the eggplant slices in 425 F oven for . Just brush the slices with olive oil and bake until lightly browned. You could also roast the red and yellow peppers whole. Once the peppers are charred on the outside, remove and place inside a paper bag and allow them to steam. This allows the skin to peel off easily. When cool enough to touch , remove the skin and slice the flesh into strips.
Heat the remaining olive oil in the same pan. Add the garlic and saute till an aroma is given off. Do this on a low flame, you don't want to brown or burn the garlic but just infuse the oil with all of its flavor. Next add the nuts and heat them till they get crunchy. Add the chilly flakes and dried herbs, the red and yellow peppers and saute till the peppers are tender-crisp. Add the roasted eggplant slices.
Finally add the torn basil leaves and mix gently.
Add the pasta and combine with all of the veggies making sure that the oil coats all the strands and the seasoning is distributed evenly.
If you find that the pasta is too dry you can add a tiny amount of the reserved pasta water to moisten it. Just before serving toss in the cubed mozzarella or bocconcini. Grate Parmesan over the pasta and garnish with more fresh basil leaves. Serve hot with crusty garlic bread on the side.

Friday, October 23, 2009

Matki Chi Usal

Another Maharashtrian classic that is super delicious, nutritious and very easy to put together. I'm starting to like Maharshtrian food a LOT, simply because the ingredients used are few, they are mostly wholesome and hearty and there's not much you do with it! Keep it simple is the underlying theme here.

MatkiChiUsal

Matki or Moth beans are packed with proteins, vitamins and minerals. They have a wonderful nutty flavor and easily take on seasoning of any kind. When you sprout beans and legumes, you amplify all the of the good stuff. Germinating beans produce a battery of super enzymes and phytochemicals that are extremely beneficial for you.

Demonstrated by Chef Johnson at the Taj Blue Diamond in Pune, in a very easy going and logical manner, this recipe is again something I chanced upon when flipping through the channels on the broken TV. Not really broken but it is "broken" whenever my lil one gets too wrapped up in it. It is now in the broken phase for the next two weeks. Mommy cannot fix it as she doesn't have the tools that Handy Manny does, remember?
I know, I know why can't you just say NO? I wish I could. Simply say NO. But I can't, and he seems to understand better when I explain it to him through people of his world. Bad, I know.

MatkiChiUsal2

Sure it does take a little bit of extra effort to soak, drain and then sprout the beans. Just keep telling yourself about how good they are for you. I soaked these beans overnight. Drained the water the next morning and kept them tightly wrapped in a moist muslin cloth in a comfortable humid area. Voila! 12 hours later you see them all - alive and kicking! Too bad you're going to be cooking them and eating them. How monstrous! Stop. They are just beans.

Follow the recipe just as suggested, I didn't make any changes and it turned out real nice. The slightly sweet and spicy hot usal paired well with the soft, light-as-air laadi pav. Serve hot with sliced onions and twists of lime.

MatkiChiUsal3

I'm sending this recipe across to this month's MLLA host - Jeanne, who has a blog filled with beautiful pictures and wonderful recipes MLLA (My Legume Love Affair) event. This event was started by Susan who has a fantastic blog space dedicated to her beautifully thought out recipes and pictures.

Recipe

Cooking time 25 mins.
Difficulty level - Easy.
Serves 2.

Ingredients

1 cup sprouted matki/ moth beans
2 tsp neutral oil
1 tsp mustard seeds
a pinch hing/asafoetida
2 onions, chopped fine
2 tomatoes, chopped fine
1 tsp red chilli powder
1 tsp salt
1/2 tsp turmeric
1 cup water
1 tsp of goda masala( if you can't find it substitute with regular garam masala)
2 tsp roasted peanut, powdered
1 tsp of jaggery
4 tsp fresh coconut, grated
2 tsp coriander leaves
lemon juice to taste

Method

Heat oil in a pan. Add the mustard seeds, hing and onions. Saute till onions are soft and translucent. Then add the chopped tomatoes. Once the tomatoes are soft and cooked through, add the turmeric and red chilli powder. Saute till an aroma is given off, 1-2 mins.
Add the sprouted matki, salt and water. Mix well. Cover and cook till the beans are 80% cooked. Don't cook the beans to a mush, they should be soft but should still hold their shape. Then add the goda masala, jaggery, freshly grated coconut and roasted peanut powder. Mix well and cook for a further 5 mins. Squeeze lime juice according to taste. Garnish with fresh coriander leaves and grated coconut. Serve hot with paav.

Friday, October 9, 2009

Shilpa Akka's Bisi Bele Bath

If you're from Karnataka, chances are you've eaten this signature Kannadiga dish at least once. Bisi Bele Bath, literally translates to Bisi - hot, Bele - is toor dal, a lentil and Bath is a generic name given to seasoned rice in Southern India. It's a one pot meal which incorporates rice, lentils, vegetables and is seasoned generously with what .....you've guessed it Bisi Bele Bath powder.

BBB4

And for those of you who thought it translated to a hot shower with lentils floating around. You are so wrong.....

After typing Bisi Bele Bath for the umpteenth time, I'm switching to the way I've seen some college and school canteens address this dish - BBB or "B cube". "C squared B" is short for Chow Chow Bath, which is not a bath at all! How groovy!

You'll often hear the manager sitting at the token sale counter scream right across the canteen in a loud voice, "Illi ondhu B cube mathu yeradu C squared B kodi......". When translated to English - he's just placing an order of Bisi Bele bath and two orders of Chow Chow Bath . Before this turns into a post about Kannada or amateurish Algebra, let's move onto the recipe.

There are many versions of BBB powder and MTR makes a pretty darn good one. But freshly ground masala - bearing your stamp of authenticity triumphs over opening a pack of store bought powder, any day! This recipe was passed onto me by my sister- in -law and she makes a killer BBB. It comes very close to the versions I've had as Prasada at temples and also to the one that Kadambam used to make. I cannot thank her enough for sharing this recipe with me!

BBB3

If you like BBB - give this recipe a try. A little more work than snipping open a packet of MTR BBB powder but well worth the effort. This is a great dish to make if you're inviting guests who love South Indian Food as it goes a little deeper than the ubiquitous idlis, dosas and vadas. Tastes delicious with happala or potato chips. I'm not sure if pacchadi on the side is authentic but I love it. Makes for a wonderful soothing side and offers you a welcome respite from the spicy rice.

This is a simple and satisfying one pot meal. If you're short on time, by all means go ahead and substitute a store bought powder. Drop me a line if you have any questions or feedback!

BBB2

Recipe

Difficulty level - Moderate
Serves - 4
Time - 1 hr 15 mins

Ingredients

1 cup toor dal
1 cup rice
2 cups mixed vegetable chunks ( carrots,french beans, potatoes, peas, double beans, green bell pepper/capsicum)
1/2 cup sambar onions/shallots or 1 big red onion cut into cubes
3 tbsp Bisi Bele Bath powder/pudi - recipe follows
2 tsp tamarind extract
1/2 tsp turmeric powder
1/4 tsp asafoetida/hing
15 curry leaves
1/2 tsp mustard seeds
4 red chillies broken into halves
10 cashew nuts
4 tbsps ghee

For the BBB masala powder or pudi -

1/2 tbsp black mustard seeds
1/2 tbsp jeera/cumin seeds
A scant 1/2 tsp methi/fenugreek seeds
10 - 15 red chillies
1/2 tbsp black peppercorns
1 tbsp poppy seeds/khus khus
3 1/2" cinnamon sticks
6 - 8 cloves
3 tbsp coriander seeds
1 tbsp chana dal
1/2 tsp oil

Method


To make the masala powder -

Take a heavy bottomed pan and on a very very low flame roast the listed ingredients in the said order using very few drops of oil. Adding too much oil will make the powder greasy and lumpy. Alternatively you can also dry roast.
First roast the poppy seeds - do not brown but just roast enough until they give off an aroma. Remove onto a plate. Next goes the jeera, peppercorns, mustard, methi and dhania seeds. Keep aside. Then fry the red chillies, do not blacken them. Roast the channa dal,cinnamon and cloves.
Remember to never turn up the heat as this would make the powder dark and very strong in odor. You just want to gently roast the ingredients on a very low flame.

When grinding the roasted spices to a powder, start with the poppy seeds first as they are difficult to grind because they are so tiny. Then add the rest of the ingredients and grind to a fine powder. Don't remove the lid of the grinder - you want to trap all the aromas until it's time to use the spice mix.

For the Bisi Bele Bath -

1)Wash and soak the rice and dal separately for 20 mins.
2)Pressure cook the rice and dal in separate containers until the cooker gives off one whistle. Continue to cook after lowering the flame for an additional 5 mins. Switch off.
3)Take a thick bottomed large pan or cooker which can easily hold the BBB as it tends to get voluminous. Heat 2 tsp of ghee. Add the vegetable chunks and the onions, salt, hing and turmeric powder and saute for 2 mins. Add a little water and 3 tbsp of the prepared powder. Cover and cook until the veggies are slightly soft.
4)Add the cooked rice an dal. Add tamarind extract and salt to taste. Mix well so the seasoning is uniformly distributed. Add sufficient water to get a slightly flowing consistency. Similar to the consistency of khichdi or risotto.Cook for another 5 - 10 mins and let the flavors meld together.
There is no hard and fast rule here. You can add more or less tamarind extract, BBB powder and water to get it to taste exactly the way you want it to.
5)Finally for the vogarane/tadka - Heat 4 tbsps of ghee(use more if you like!) add the mustard seeds, curry leaves, red chillies and cashews fry until they give off an aroma and the cashews are golden brown in color. Pour onto the hot rice.
6)Serve immediately with potato chips or happala.

Tuesday, October 6, 2009

Malaysian Tofu Satay with Peanut Sauce

Satay or Sate are little strips of skewered meat,chicken, fish or tofu that are usually grilled over a charcoal fire. None of my previous attempts at home made chicken satay could have prepared me for the delicious taste of real satay at a street hawker stall in Kuala Lumpur. I was surprised at how thin the chicken strips were. They were literally tiny morsels of super moist, flavorful, very lightly and beautifully spiced chicken. Every little bite was packed with the fragrance of lemongrass, coconut milk undertones and the smokiness from the charcoal grill. Rustic and succulent.

Satay3

The chicken satay was served alongside tiny wedges of steamed rice cakes and a savoury sweet sauce which was sharp but in a pleasant kind of way. I was hooked! And I made it a point to eat them every day for the rest of the vacation. Gluttony.

Having turned vegetarian for close to three years now, I occasionally do a tofu - take on traditional recipes. So when I saw these perfect looking tofu skewers on Susan's wonderful blog, I just had to make it......with much hindrance from S.
Tofu satays??? I could tell that the meat-atarian husband wasn't thrilled. I usually get this reaction when I substitute tofu or beans or potatoes for chicken or meat or fish - in an "otherwise great recipe" that wasn't meant to be made with Tofu( according to him).

Satay1

But then he loved them and asked that I make these again for his friends at a dinner next weekend. This is definitely an easy breezy appetizer to make when you have company. As all you have to do is whizz the marinade together, slice up and marinate the tofu and leave it the fridge until you're ready to grill them up!

I made my own version of the peanut sauce, as I didn't have the time to follow the suggested recipe. This recipe is based on the peanut sauce usually served at Thai restaurants in the USA. I loved the peanut sauce and it was great on toast for breakfast the next day!

Satay5

Recipe

For the tofu satays look for the original recipe here and for Susan's clever modifications here .

Easy Peanut Sauce - recipe follows

Ingredients

4 tbsps of chunky/creamy peanut butter or 1/2 cup roasted and skinned peanuts
1 tbsp of lemongrass chopped
2 shallots
1 tsp of soy sauce
1/2 tsp of sugar
8 dried chillies + 1 clove garlic soaked in 1 tsp of vinegar overnight

Recipe

Simply blend the ingredients together and taste for the right balance of flavors. Adjust seasoning accordingly.

Note - soak the bamboo skewers overnight in water to prevent them from burning or getting charred when grilling.
I didn't grill these satays, I just pan fried them on a hot, lightly greased griddle on all four sides until cooked through and browned on the outside.

Thank you Susan for sharing this delicious recipe!

Friday, October 2, 2009

Mango Mousse with Saffron and Pistachio

I'm happiest when I bake a batch of cookies or whip up a good dessert. It's magical to see a few ingredients that were just lying on your table turn into something as luscious as the Alphonso mango mousse that I made yesterday. At 2 a.m no doubt. For those of you who know me real well, it shouldn't surprise you at all.(read CBD)

MangoMousse4

When I fall asleep at night my brain is usually clicking away thinking about flavors and combinations and cool new ideas to experiment with in my kitchen. It's more interesting than counting sheep. Trust me - try it and you'll find going to bed on a sweet note helps.

Discovered this beautiful bottle of organic Alphonso mango puree. Divine just by itself. It's being made and sold by AshtaVinayak Farms. One tiny taste and you can tell that it's good stuff. Amazingly good stuff, sans that metallic taste which I swear I can detect sometimes in canned fruit and it has the most gorgeous vivid orange you can imagine. It's liquid gold. That's what it is.

The mousse turned out perfect. Of course it should when you follow the recipe on this fairytale blog Tartelette by Helen - genius beyond compare . I then topped it with a saffron and mango sauce. Chopped pistachios were added for a difference in texture and a whopping green that contrasted perfectly against the mango-ey orange color.

MangoMousse3

The recipe for the Mango Saffron sauce is as below. Any modifications for the mousse recipe from my end? None, except that I always (out of a habit mostly) strain the fruit puree after adding in the gelatin. Just to catch any lumps and grits. Follow the original recipe for the mousse. The mango sauce goes on the mousse after the mousse has firmed up a bit(this about 2-3 hours in the fridge). Return to the fridge after topping the mousse with the sauce and chill for at least 4 - 6 hrs or until firm. The nuts are added just before serving or they'll end up being soggy.

This was very easy to put together. The mousse was delicious - light and airy. Ringing with the Alphonso goodness. Definitely going to be making this again. More than once for sure.

MangoMousse2

Here are some additional notes for my readers who are making a mousse for the very first time.

You don't need an electric beater to whip the cream. So don't fret if you don't have one.(It helps a LOT though).I have whipped cream using just a hand whisk and it works just fine. It just takes a little longer and more muscle effort.
Make sure that the cream is well chilled. And if you live in an area where it's exceptionally warm, use an ice bath to hold the bowl in which you whip the cream to help the cream whip up easily.
Gelatin dissolves better when left to bloom. To bloom gelatin add water and allow it to rest and absorb the water. The crystals will be spongy and water laden. This takes about 10 mins.

MangoMousse1

Recipe

Saffron Mango Sauce

Ingredients

10 strands of good saffron
1 tbsp of hot milk
4 tbsp of mango puree

Method

You can make this sauce right after you make the mousse. Chill the sauce until the mousse has firmed up a bit, top it with a layer of the sauce and return to the fridge to chill for 6 hours or until firm.
Soak the saffron in the hot milk for 20 mins. Allow the mixture to come to room temperature. Mix in the mango puree. If the fruit that you're using is not sweet enough, add a tsp of sugar.

And now you're in mango heaven. Amen.